Giới thiệu
Nextcloud là một phần mềm (Mã nguồn mở) miễn phí giống như Dropbox, Google Drive, một nhánh của dự án ownCloud. Nextcloud được viết bằng PHP và JavaScript, nó hỗ trợ nhiều hệ thống cơ sở dữ liệu như MySQL / MariaDB, PostgreSQL, Oracle Database và SQLite. Để giữ cho các tệp của bạn được đồng bộ hóa giữa Máy tính để bàn và máy chủ của riêng bạn, Nextcloud cung cấp các ứng dụng cho máy tính để bàn Windows, Linux và Mac và một ứng dụng di động cho Android và iOS. Nextcloud không chỉ là một bản sao dropbox, nó cung cấp các tính năng bổ sung như Lịch, Danh bạ, Lên lịch tác vụ và phát trực tuyến phương tiện với Ampache.
Các bước cài đặt NextCloud
Bước 1: Cài đặt NGINX và PHP-FPM
Trước khi bắt đầu bạn hãy cài đặt NGINX và PHP7-FPM vào, để cài đặt được bạn cần cài đặt epel-release.
yum -y install epel-release
- Bây giờ cài đặt Nginx từ kho EPEL.
yum -y install nginx
Sau đó, bạn phải thêm một kho lưu trữ khác cho php7-fpm. Có một số kho lưu trữ có sẵn trên mạng cung cấp các gói PHP 7, mình sẽ sử dụng webtatic ở đây. Thêm kho lưu trữ webtatic PHP7-FPM.
rpm -Uvh https://mirror.webtatic.com/yum/el7/webtatic-release.rpm
- Tiếp theo, cài đặt PHP7-FPM và một số gói bổ sung để cài đặt Nextcloud.
yum -y install php72w-fpm php72w-cli php72w-gd php72w-mcrypt php72w-mysql php72w-pear php72w-xml php72w-mbstring php72w-pdo php72w-json php72w-pecl-apcu php72w-pecl-apcu-devel
Cuối cùng, kiểm tra phiên bản PHP từ thiết bị đầu cuối của máy chủ để xác minh rằng PHP được cài đặt chính xác.
Bước 2: Cấu hình PHP-FPM
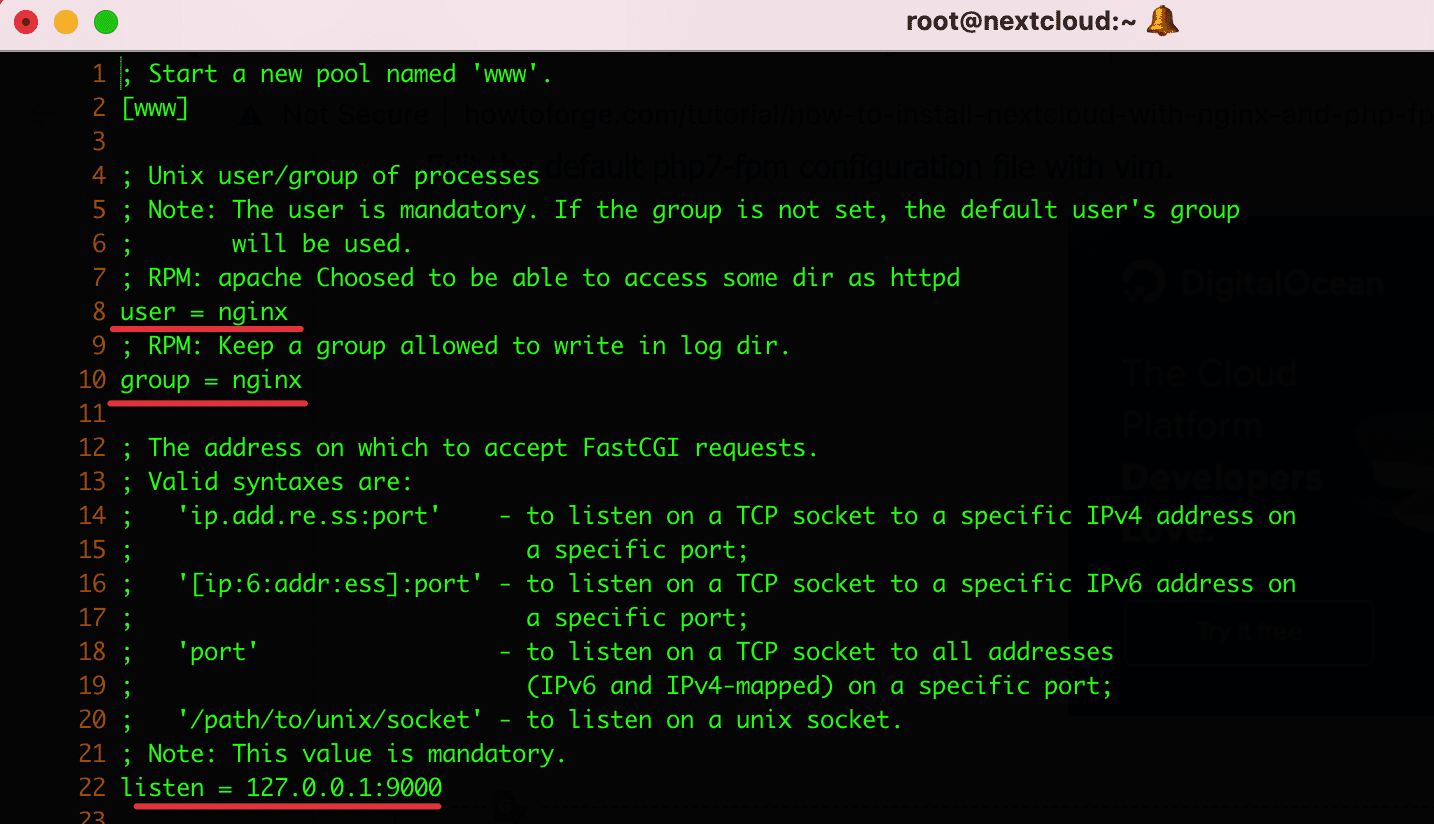
Trong bước này, bạn cần cấu hình php-fpm để chạy với Nginx. Php7-fpm sẽ chạy dưới người dùng nginx và lắng nghe port 9000. Bạn hãy mở file và chỉnh sửa tệp cấu hình php7-fpm.
vi /etc/php-fpm.d/www.conf
Tại dòng thứ 8 và 10 bạn thay đổi người dùng, nhóm thành nginx
user = nginx
group = nginx
Tại dòng 22, hãy đảm bảo rằng php-fpm đang chạy dưới port máy chủ.
listen = 127.0.0.1:9000
Bạn di chuyển đến dòng 366-370 và Uncomment để kích hoạt các biến môi trường hệ thống php-fpm.

env[HOSTNAME] = $HOSTNAME
env[PATH] = /usr/local/bin:/usr/bin:/bin
env[TMP] = /tmp
env[TMPDIR] = /tmp
env[TEMP] = /tmp
Sau khi sửa xong bạn hãy save lại.
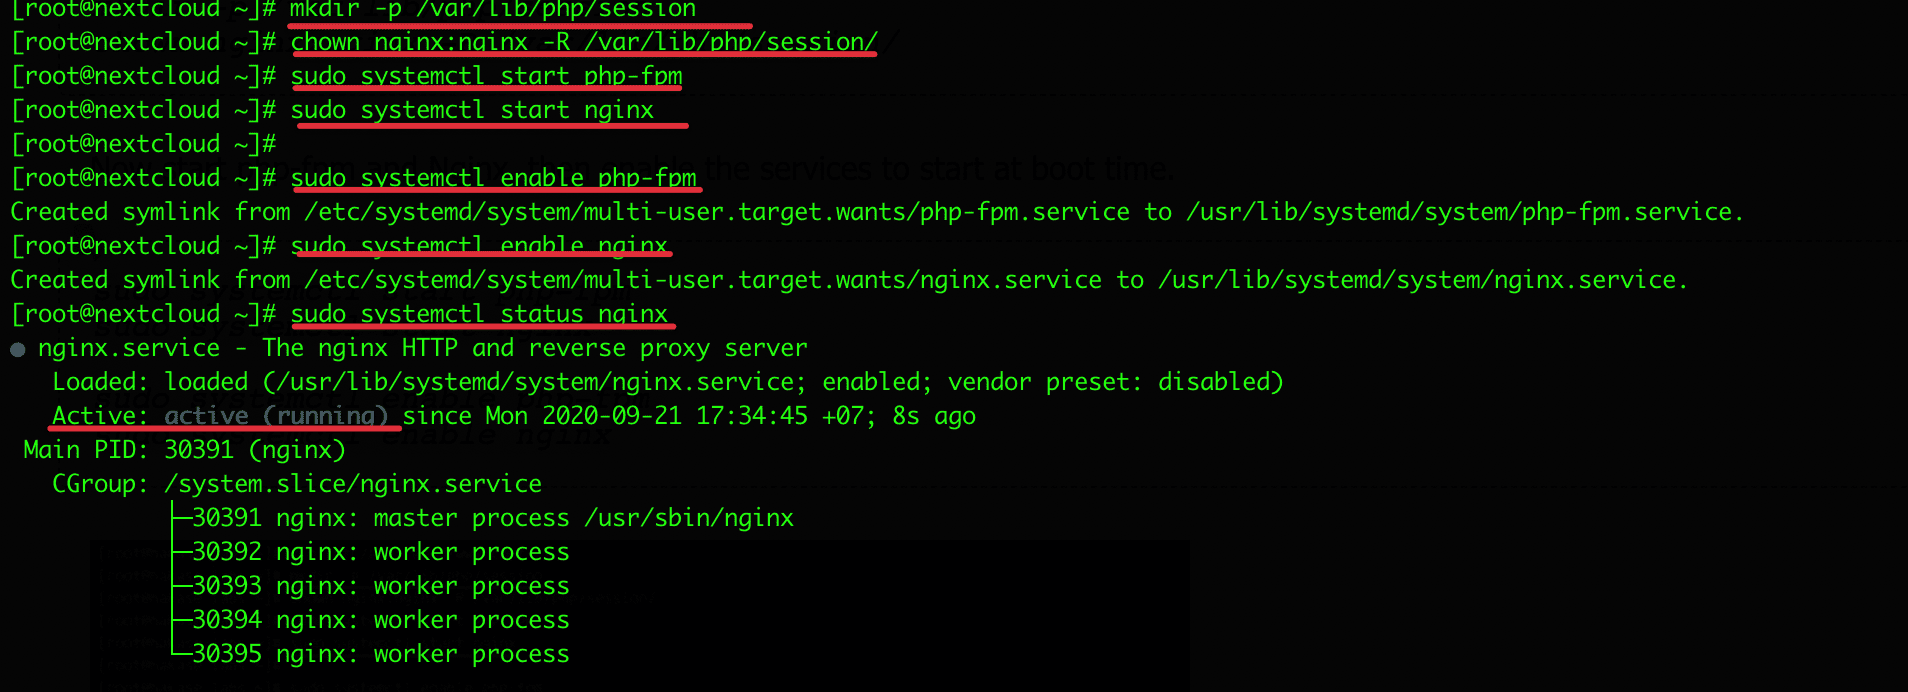
Tiếp theo, tạo một thư mục mới cho session trong thư mục ‘/var/lib/‘ và change owner thành ‘nginx‘.
mkdir -p /var/lib/php/session
chown nginx:nginx -R /var/lib/php/session/
Bây giờ hãy khởi động php-fpm và Nginx, và cho phép khởi động cùng hệ thống.
Lưu ý: Nếu bạn đang cài đặt ở quyển root thì không cần dùng sudo. Tuy nhiên một số bạn dùng user sudo nên mình sẽ dùng sudo để hướng dẫn luôn.
sudo systemctl start php-fpm
sudo systemctl start nginx

sudo systemctl enable php-fpm
sudo systemctl enable nginx
Bước 3: Cài đặt và cấu hình MariaDB
- Mình sẽ cài đặt và sử dụng MariaDB cho NextCloud
yum -y install mariadb mariadb-server
- Khởi động mariadb và cho phép khởi động cùng hệ thống.
systemctl start mariadb
systemctl enable mariadb
- Cấu hình mật khẩu mariadb
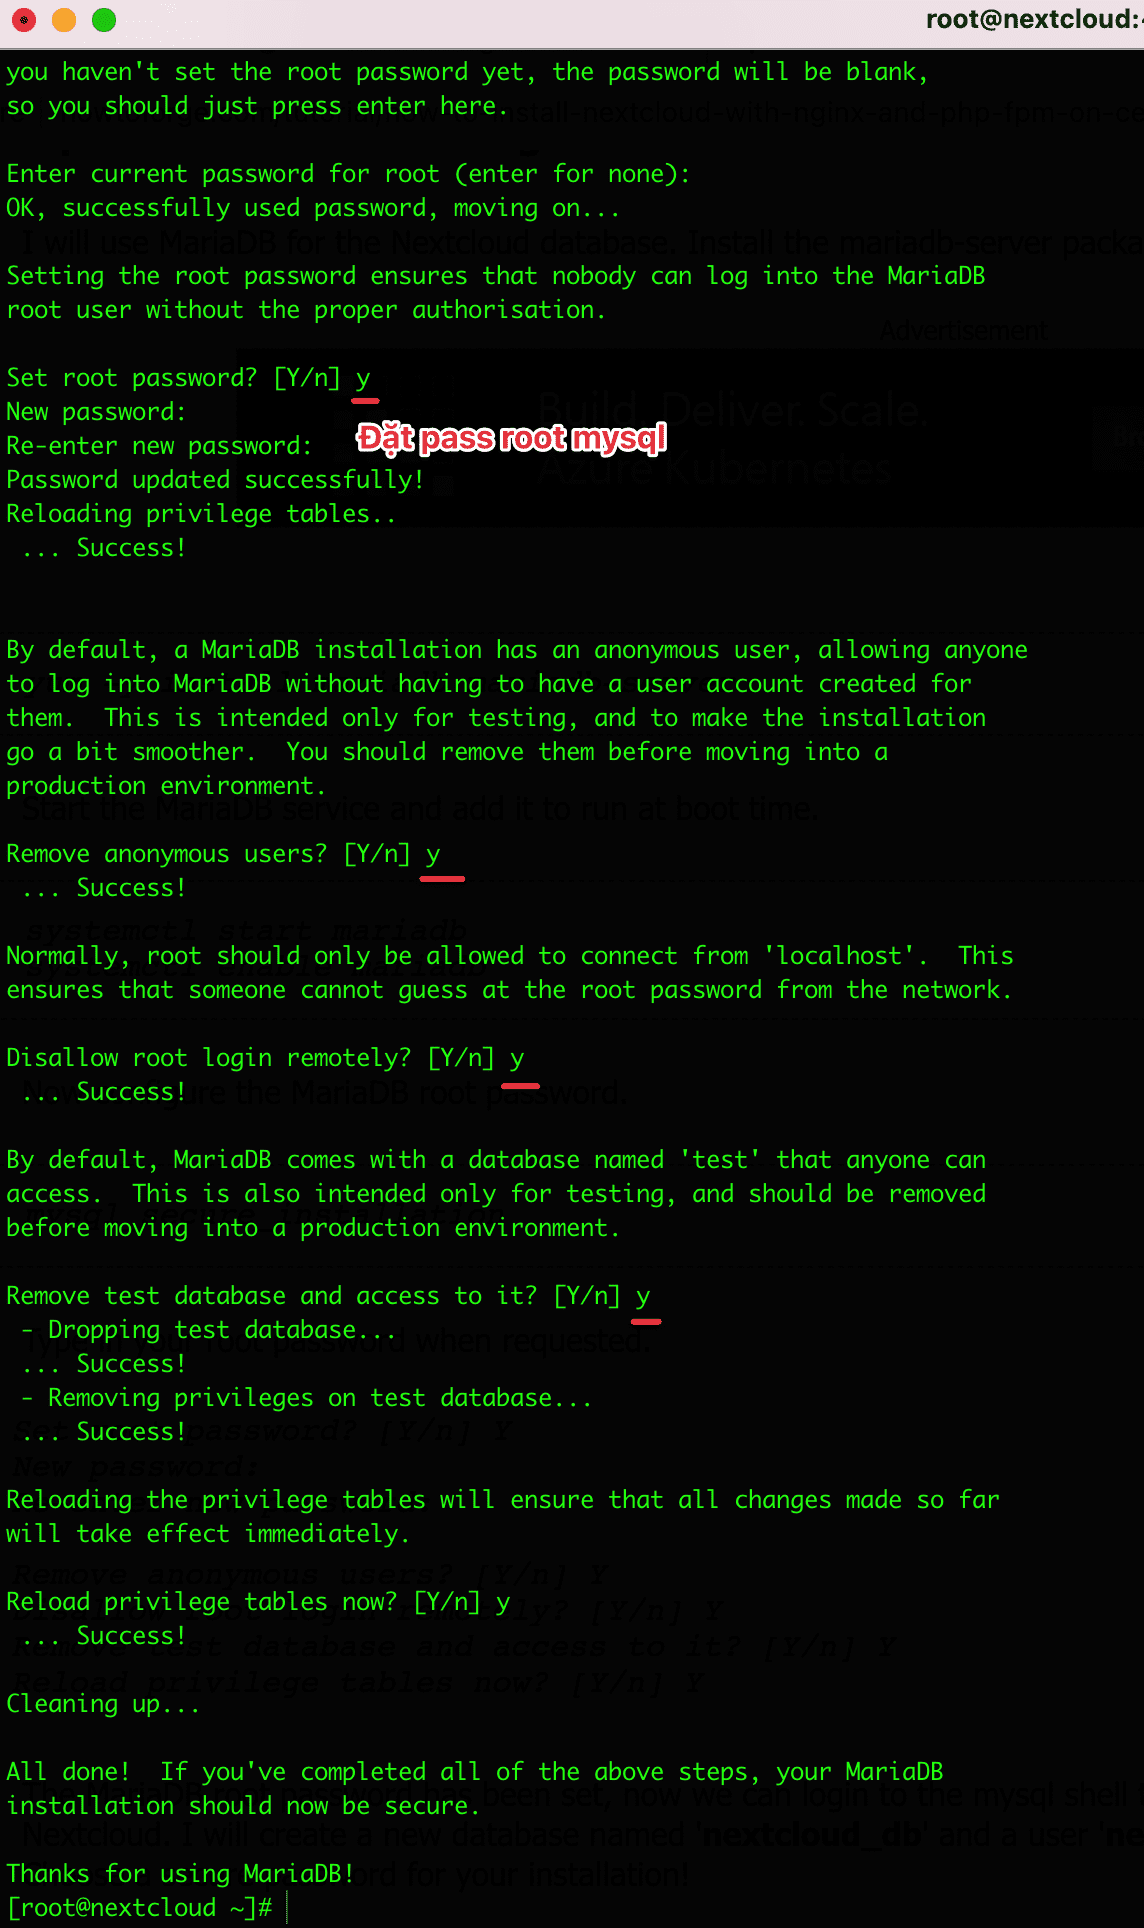
mysql_secure_installation
- Bạn nhập mật khẩu nếu được yêu cầu.
Set root password? [Y/n] Y
New password:
Re-enter new password:

Remove anonymous users? [Y/n] Y
Disallow root login remotely? [Y/n] Y
Remove test database and access to it? [Y/n] Y
Reload privilege tables now? [Y/n] Y
Sau khi hoàn tất bước trên, bạn hãy tạo database, user và password để kết nối với NextCloud.
mysql -u root -p
Type Password: Nhập pass root đã tạo vào.
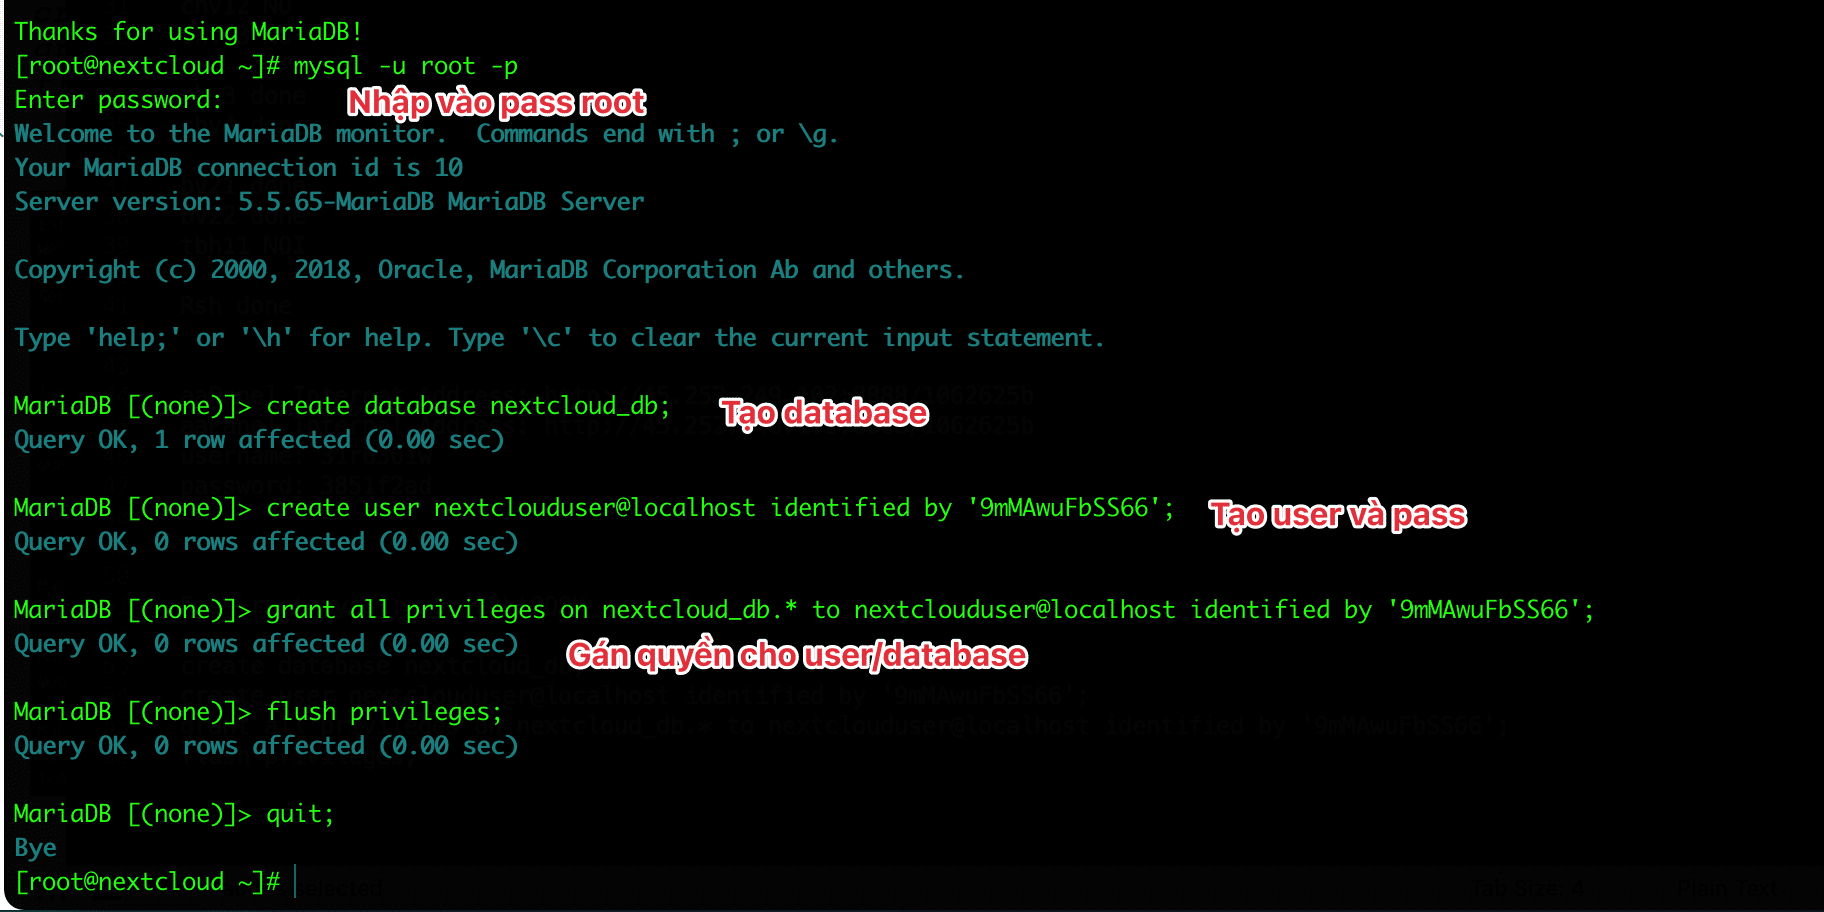
Nhập các dòng query sau để tạo database, người dùng và pass.
create database nextcloud_db;
create user nextclouduser@localhost identified by '9mMAwuFbSS66';
grant all privileges on nextcloud_db.* to nextclouduser@localhost identified by '9mMAwuFbSS66';
flush privileges;
quit;
Chú thích:
- Dòng 1: nextcloud_db tên database
- Dòng 2: nextclouduser tên user. 9mMAwuFbSS66 là mật khẩu của user nextclouduser.
- Dòng 3: Gán quyền
Bước 4: Tạo chứng chỉ SSL tự ký cho NextCloud
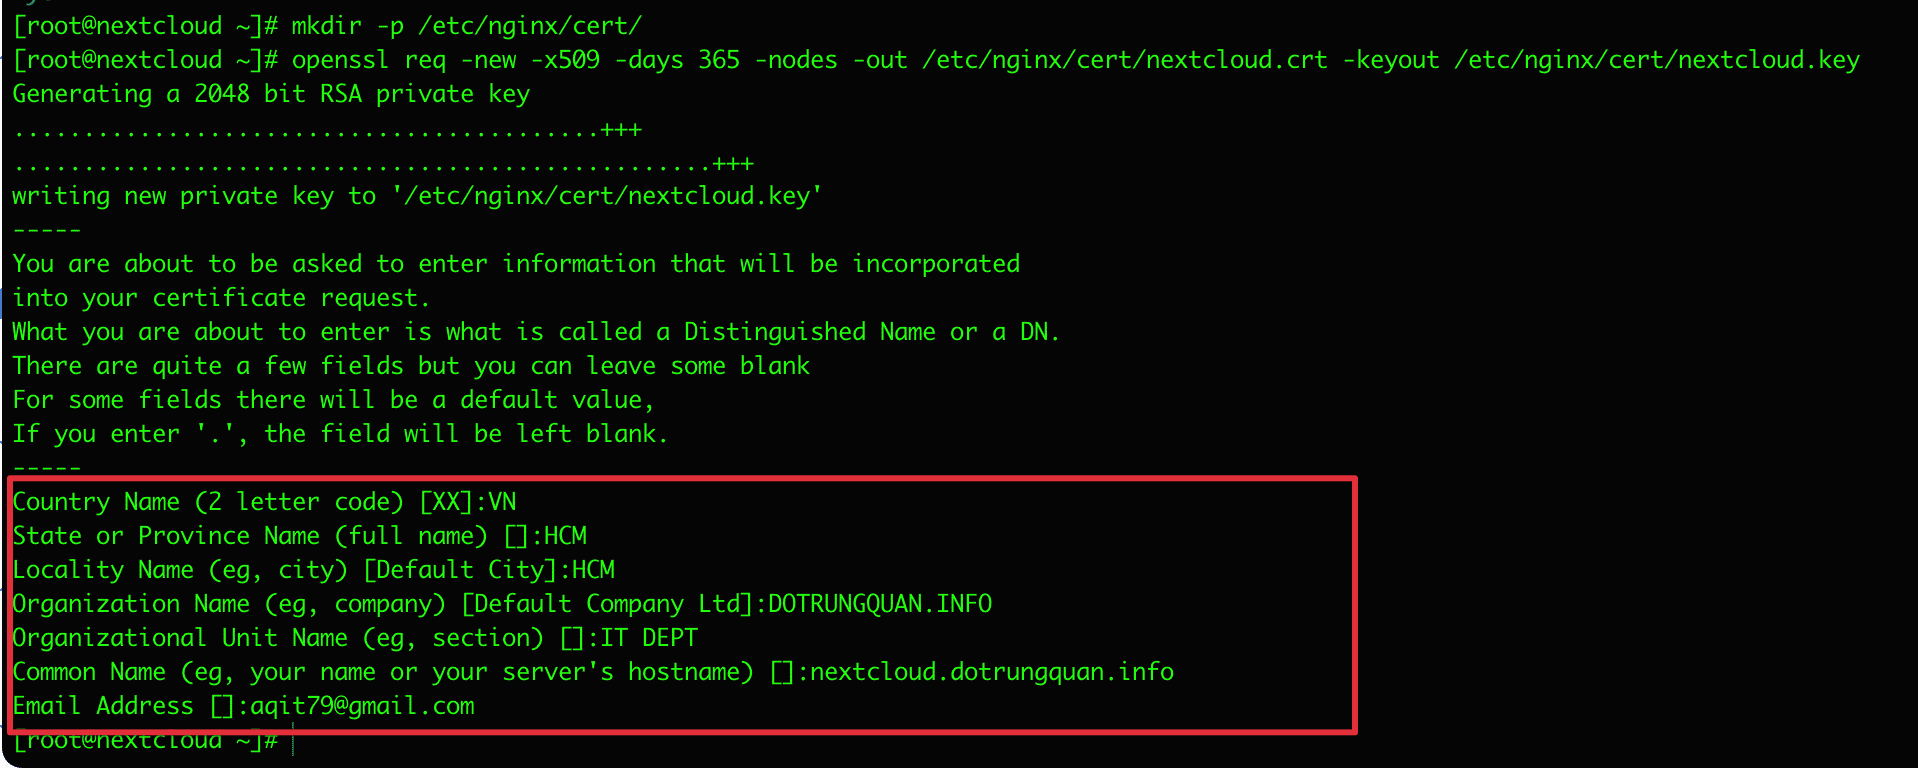
Vì mình chạy với HTTPS nên mình sẽ cần tạo một chứng chỉ tự ký để khởi chạy. Bạn hãy làm tuần tự theo cách của mình. Ở các cách cuối bài mình sẽ hướng dẫn bạn cài SSL riêng và Let’s Encrypt
mkdir -p /etc/nginx/cert/
openssl req -new -x509 -days 365 -nodes -out /etc/nginx/cert/nextcloud.crt -keyout /etc/nginx/cert/nextcloud.key
Set phân quyền 700 cho thư mục và 600 cho file.
chmod 700 /etc/nginx/cert
chmod 600 /etc/nginx/cert/*
Bước 5: Tải và cài đặt NextCloud.
Mình sẽ tải NextCloud trực tiếp từ trang chủ bằng lệnh wget. Nếu máy chủ bạn chưa được cài wget hãy thực hiện cài theo lệnh sau.
yum -y install wget unzip
Di chuyển vào thư mục /tmp và tải về, Tại có thể truy cập vào trang sau để xem tất cả các phiên bản. Tại thời điểm mình viết bản 19.0.3 là mới nhất.
cd /tmp
wget https://download.nextcloud.com/server/releases/nextcloud-19.0.3.zip
Giải nén file và di chuyển tất cả vào /usr/share/nginx/html/
unzip nextcloud-*.zip
mv nextcloud/ /usr/share/nginx/html/
Change owner NextCloud với user/group là nginx.
chown nginx:nginx -R nextcloud/
Bước 6: Cấu hình Virtual Host Nextcloud với NGINX
Tạo tệp cấu hình máy chủ ảo mới ‘nextcloud.conf‘ trong thư mục Nginx ‘conf.d‘.
cd /etc/nginx/conf.d/
touch nextcloud.conf
vi nextcloud.conf
Sau đó bạn copy và past cấu hình nextcloud bên dưới vào file nextcloud.conf.
Lưu ý: Nhớ thay dòng bôi đỏ bằng hostname của bạn vào.
upstream php-handler {
    server 127.0.0.1:9000;
    #server unix:/var/run/php5-fpm.sock;
}

server {
    listen 80;
    server_name nextcloud.dotrungquan.info; # Nhập vào hostname của bạn
    # enforce https
    return 301 https://$server_name$request_uri;
}

server {
    listen 443 ssl;
    server_name nextcloud.dotrungquan.info; # Nhập vào hostname của bạn

    ssl_certificate /etc/nginx/cert/nextcloud.crt;
    ssl_certificate_key /etc/nginx/cert/nextcloud.key;

    # Add headers to serve security related headers
    # Before enabling Strict-Transport-Security headers please read into this
    # topic first.
    add_header Strict-Transport-Security "max-age=15768000;
    includeSubDomains; preload;";
    add_header X-Content-Type-Options nosniff;
    add_header X-Frame-Options "SAMEORIGIN";
    add_header X-XSS-Protection "1; mode=block";
    add_header X-Robots-Tag none;
    add_header X-Download-Options noopen;
    add_header X-Permitted-Cross-Domain-Policies none;

    # Path to the root of your installation
    root /usr/share/nginx/html/nextcloud/;

    location = /robots.txt {
        allow all;
        log_not_found off;
        access_log off;
    }

    # The following 2 rules are only needed for the user_webfinger app.
    # Uncomment it if you're planning to use this app.
    #rewrite ^/.well-known/host-meta /public.php?service=host-meta last;
    #rewrite ^/.well-known/host-meta.json /public.php?service=host-meta-json
    # last;

    location = /.well-known/carddav {
      return 301 $scheme://$host/remote.php/dav;
    }
    location = /.well-known/caldav {
      return 301 $scheme://$host/remote.php/dav;
    }

    # set max upload size
    client_max_body_size 512M;
    fastcgi_buffers 64 4K;

    # Disable gzip to avoid the removal of the ETag header
    gzip off;

    # Uncomment if your server is build with the ngx_pagespeed module
    # This module is currently not supported.
    #pagespeed off;

    error_page 403 /core/templates/403.php;
    error_page 404 /core/templates/404.php;

    location / {
        rewrite ^ /index.php$uri;
    }

    location ~ ^/(?:build|tests|config|lib|3rdparty|templates|data)/ {
        deny all;
    }
    location ~ ^/(?:.|autotest|occ|issue|indie|db_|console) {
        deny all;
    }

    location ~ ^/(?:index|remote|public|cron|core/ajax/update|status|ocs/v[12]|updater/.+|ocs-provider/.+|core/templates/40[34]).php(?:$|/) {
        include fastcgi_params;
        fastcgi_split_path_info ^(.+.php)(/.*)$;
        fastcgi_param SCRIPT_FILENAME $document_root$fastcgi_script_name;
        fastcgi_param PATH_INFO $fastcgi_path_info;
        fastcgi_param HTTPS on;
        #Avoid sending the security headers twice
        fastcgi_param modHeadersAvailable true;
        fastcgi_param front_controller_active true;
        fastcgi_pass php-handler;
        fastcgi_intercept_errors on;
        fastcgi_request_buffering off;
    }

    location ~ ^/(?:updater|ocs-provider)(?:$|/) {
        try_files $uri/ =404;
        index index.php;
    }

    # Adding the cache control header for js and css files
    # Make sure it is BELOW the PHP block
    location ~* .(?:css|js)$ {
        try_files $uri /index.php$uri$is_args$args;
        add_header Cache-Control "public, max-age=7200";
        # Add headers to serve security related headers (It is intended to
        # have those duplicated to the ones above)
        # Before enabling Strict-Transport-Security headers please read into
        # this topic first.
        add_header Strict-Transport-Security "max-age=15768000;
        includeSubDomains; preload;";
        add_header X-Content-Type-Options nosniff;
        add_header X-Frame-Options "SAMEORIGIN";
        add_header X-XSS-Protection "1; mode=block";
        add_header X-Robots-Tag none;
        add_header X-Download-Options noopen;
        add_header X-Permitted-Cross-Domain-Policies none;
        # Optional: Don't log access to assets
        access_log off;
    }

    location ~* .(?:svg|gif|png|html|ttf|woff|ico|jpg|jpeg)$ {
        try_files $uri /index.php$uri$is_args$args;
        # Optional: Don't log access to other assets
        access_log off;
    }
}
Bạn thực hiện save lại, test nginx và khởi động lại nginx.
nginx -t
systemctl restart nginx
Bước 7: Cấu hình Firewalld
Kích hoạt và khởi động firewalld.
systemctl start firewalld
systemctl enable firewalld
Mở port HTTP và HTPPS.
firewall-cmd --permanent --add-service=http
firewall-cmd --permanent --add-service=https
firewall-cmd --reload
Bước 8: Cài đặt NEXTCLOUD
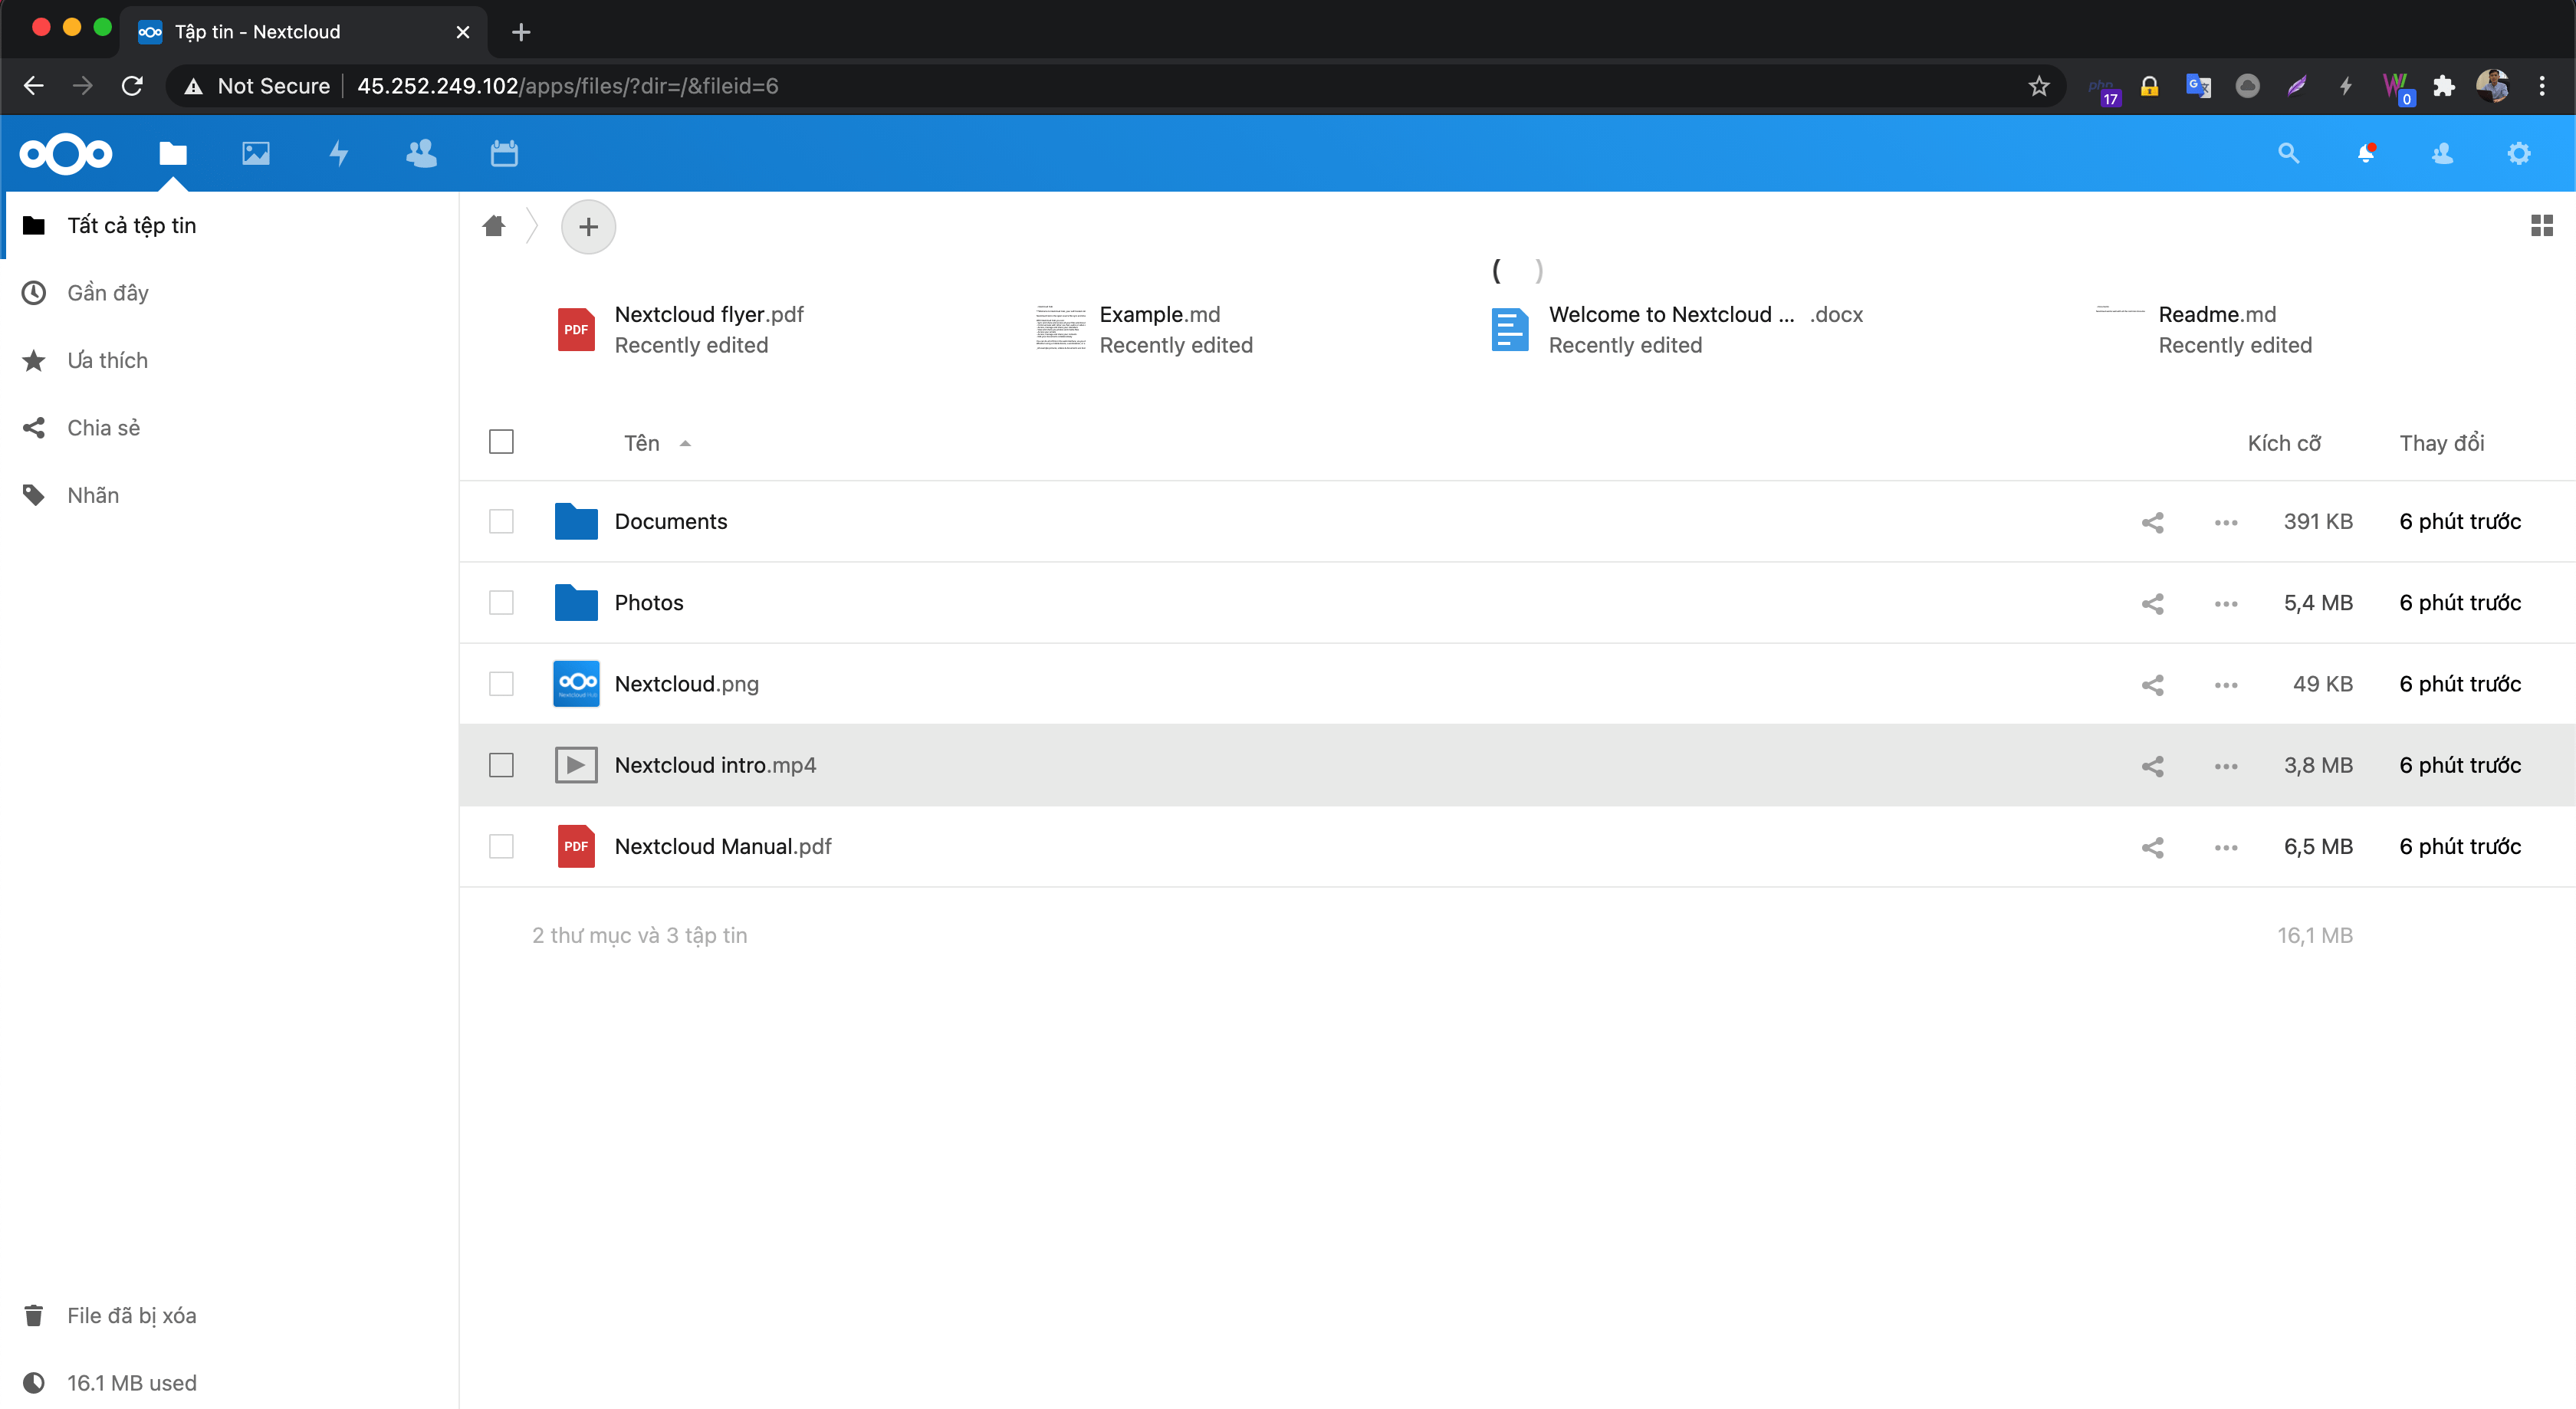
Bạn hãy truy cập với https://my-ip hoặc https://hostname. Sau đó nhập user/pass cần đặt. Nhập thông tin database đã tạo ở Bước 3 vào nhé.
Bước 9: Cho phép truy cập NextCloud từ domain
Như vậy đã hoàn tất các bước cài đặt. Tuy nhiên bạn vẫn chưa thể truy cập bằng domain được. Mà chỉ có thể truy cập từ địa chỉ IP. Nếu bạn truy cập bằng domain sẽ nhận được ảnh thông báo như sau.
Để xử lý bạn mở file config.php và thực hiện thêm vào như sau.
vi /usr/share/nginx/html/nextcloud/config
 'trusted_domains' =>
array (
0 => 'localhost',
1 => 'nextcloud.dotrungquan.info', # Thay vào bằng hostname của bạn
2 => '45.252.249.102',
),

Bước 10: Cấu hình SSL cho domain nextcloud.
Với 9 bước trên bạn đã có thể sử dụng rồi. Tuy nhiên về vấn đề bảo mật, an toàn dữ liệu bạn vẫn cần cài SSL. Ở đây mình sẽ hướng dẫn bạn thực hiện cài đặt custom SSL (SSL riêng) và SSL Let’s Encrypt sử dụng CertBOT
Cấu hình NextCloud với SSL riêng.
Ở đây mình đã có sẳn chứng chỉ SSL bao gồm Chứng chỉ (CRT) và Khóa Key(Private Key)
Bạn hãy quay lại Bước 4, nơi bạn đã tạo chứng chỉ tự ký. Tại đó có sẳn file nextcloud.crt và nextcloud.key được include vào file nextcloud.conf rồi. Nên mình chỉ cần lấy crt và key dán vào 2 file này.
Bạn làm rổng 2 file này và dán CRT, KEY có sẳn vào.
echo > /etc/nginx/cert/nextcloud.crt
echo > /etc/nginx/cert/nextcloud.key
Sau đó bạn copy chứng chỉ crt và dán vào file nextcloud.crt. Còn key thì dán vào file nextcloud.key
Khi dán xong bạn test nginx và reload lại nginx
nginx -t
service nginx reload
Cài đặt chứng chỉ SSL Let’s Encrypt với CertBOT.
Mình sẽ truy cập vào trang chủ Certbot và thiết lập máy chủ tương ứng để cài đặt. Ở đây hỗ trợ rất nhiều OS và máy chủ.
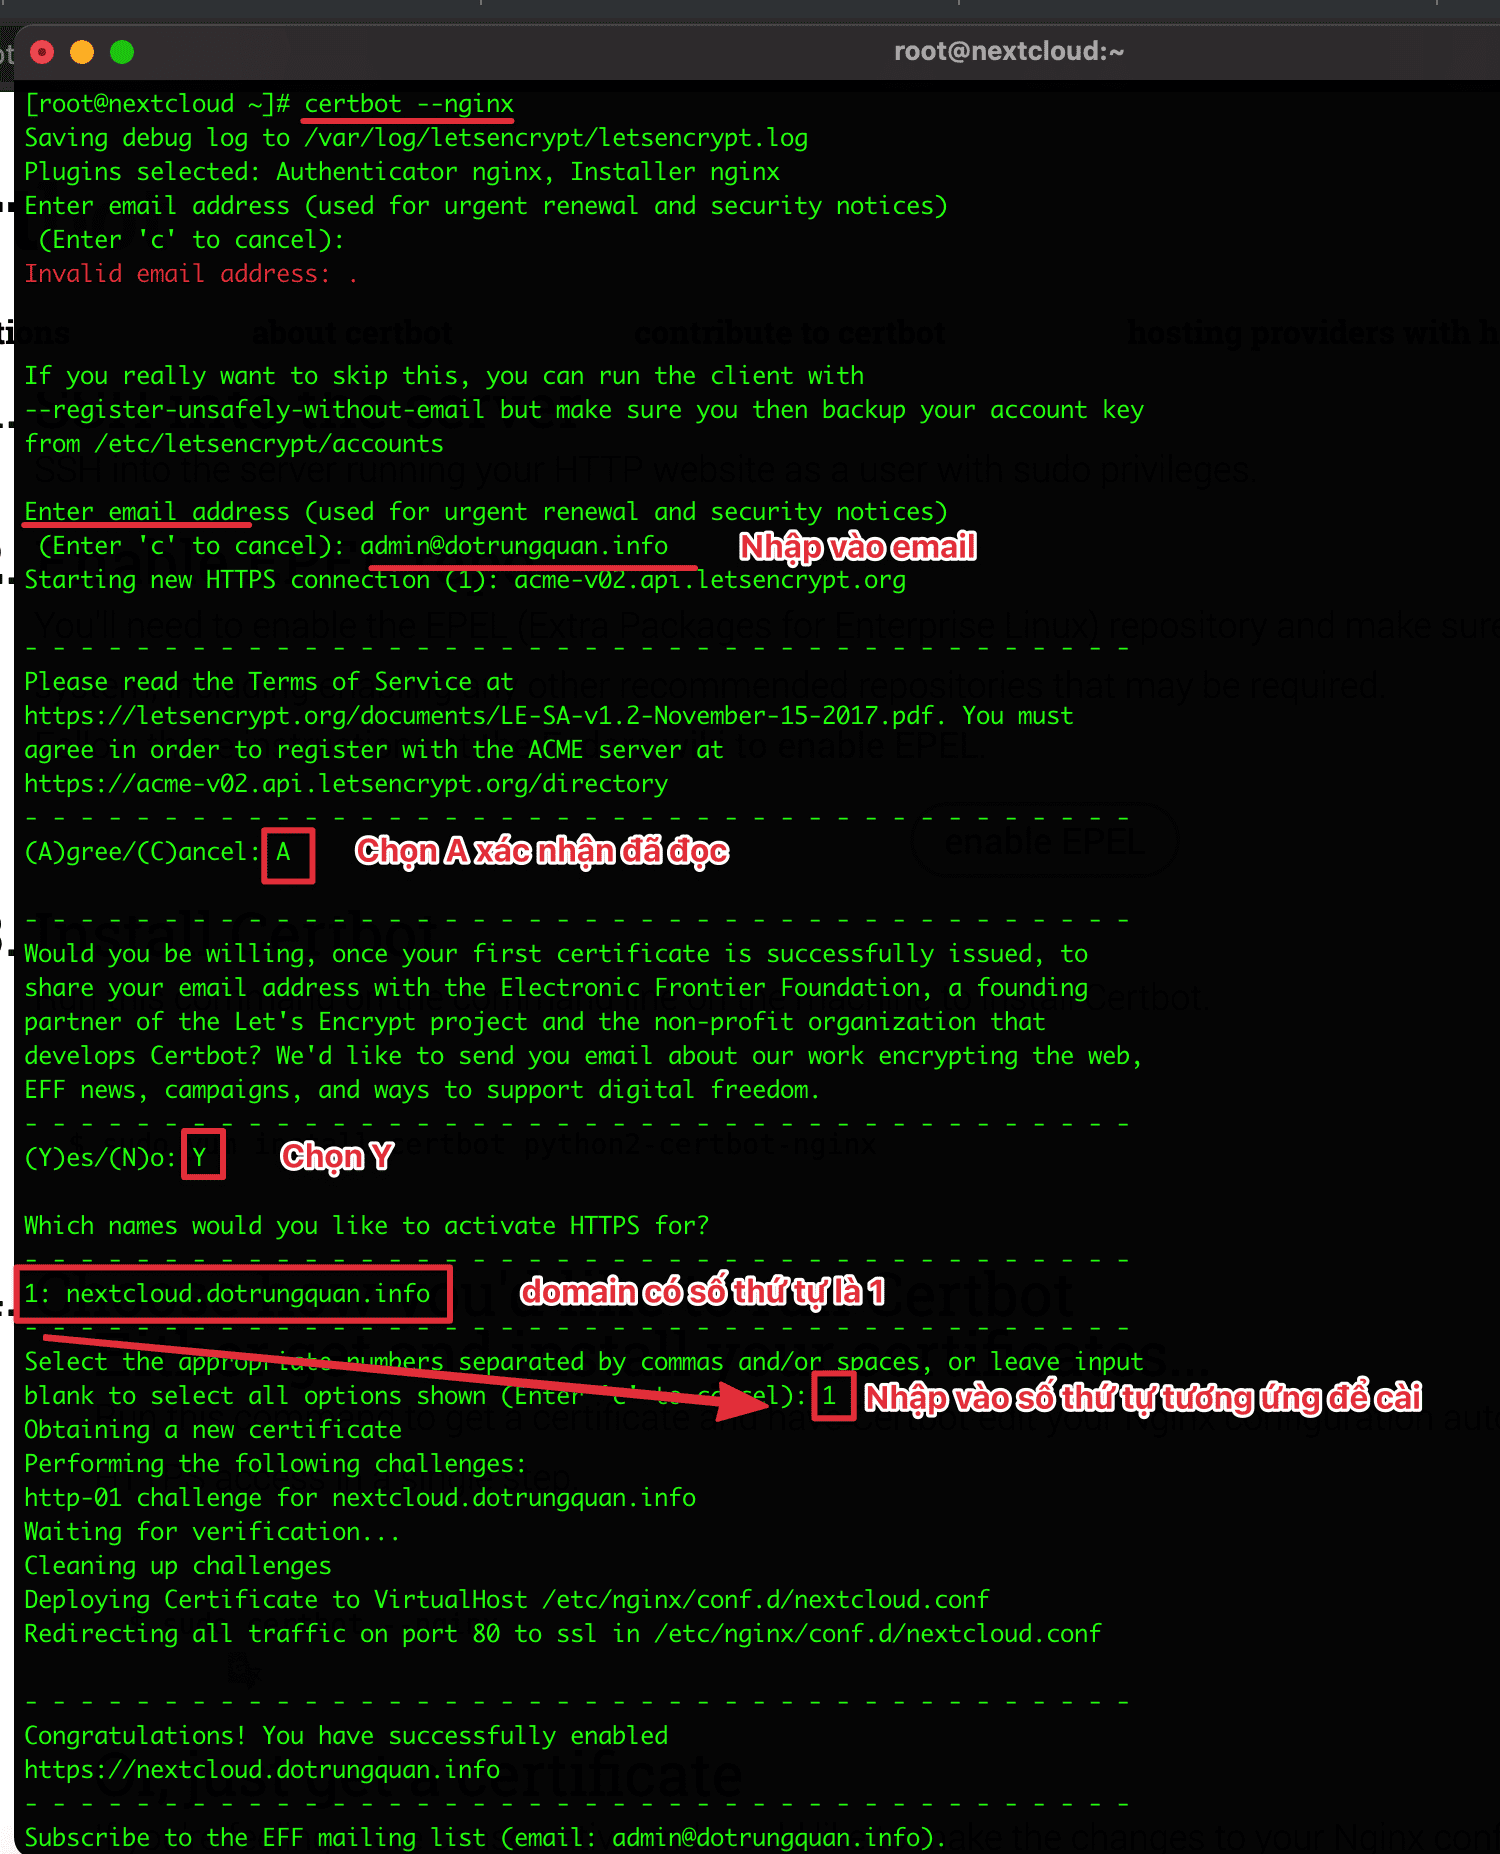
Nếu bạn đang thực hiện theo bài của mình thì cài đặt certbot với nginx như sau.
sudo yum install certbot python2-certbot-nginx
sudo certbot --nginx
sudo certbot certonly --nginx
- Cấu hình cron auto renew SSL
Bạn nhập lệnh crontab -e sau đó nhập vào dòng lệnh bên dưới vào.
echo "0 0,12 * * * root python -c 'import random; import time; time.sleep(random.random() * 3600)' && certbot renew -q" | sudo tee -a /etc/crontab > /dev/null
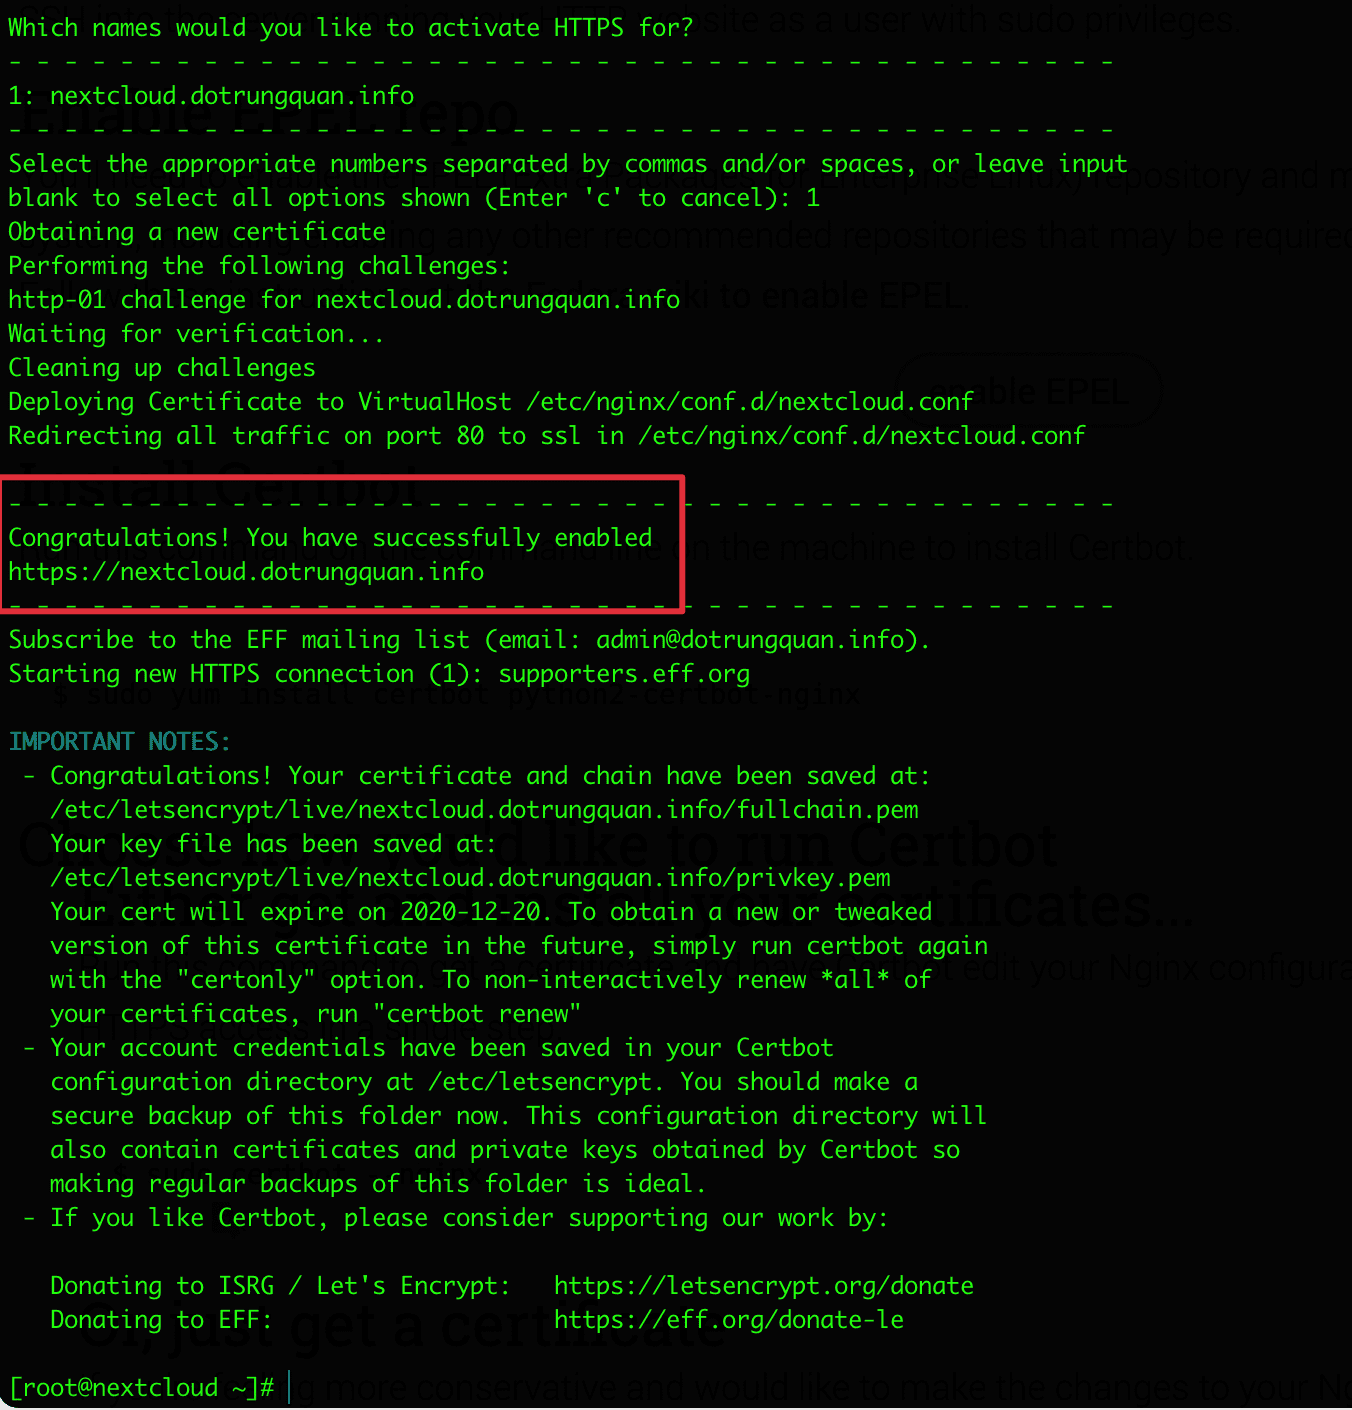
Sau khi cài xong, bạn hãy reload lại nginx và kiểm tra tại SSL Checker nhé.
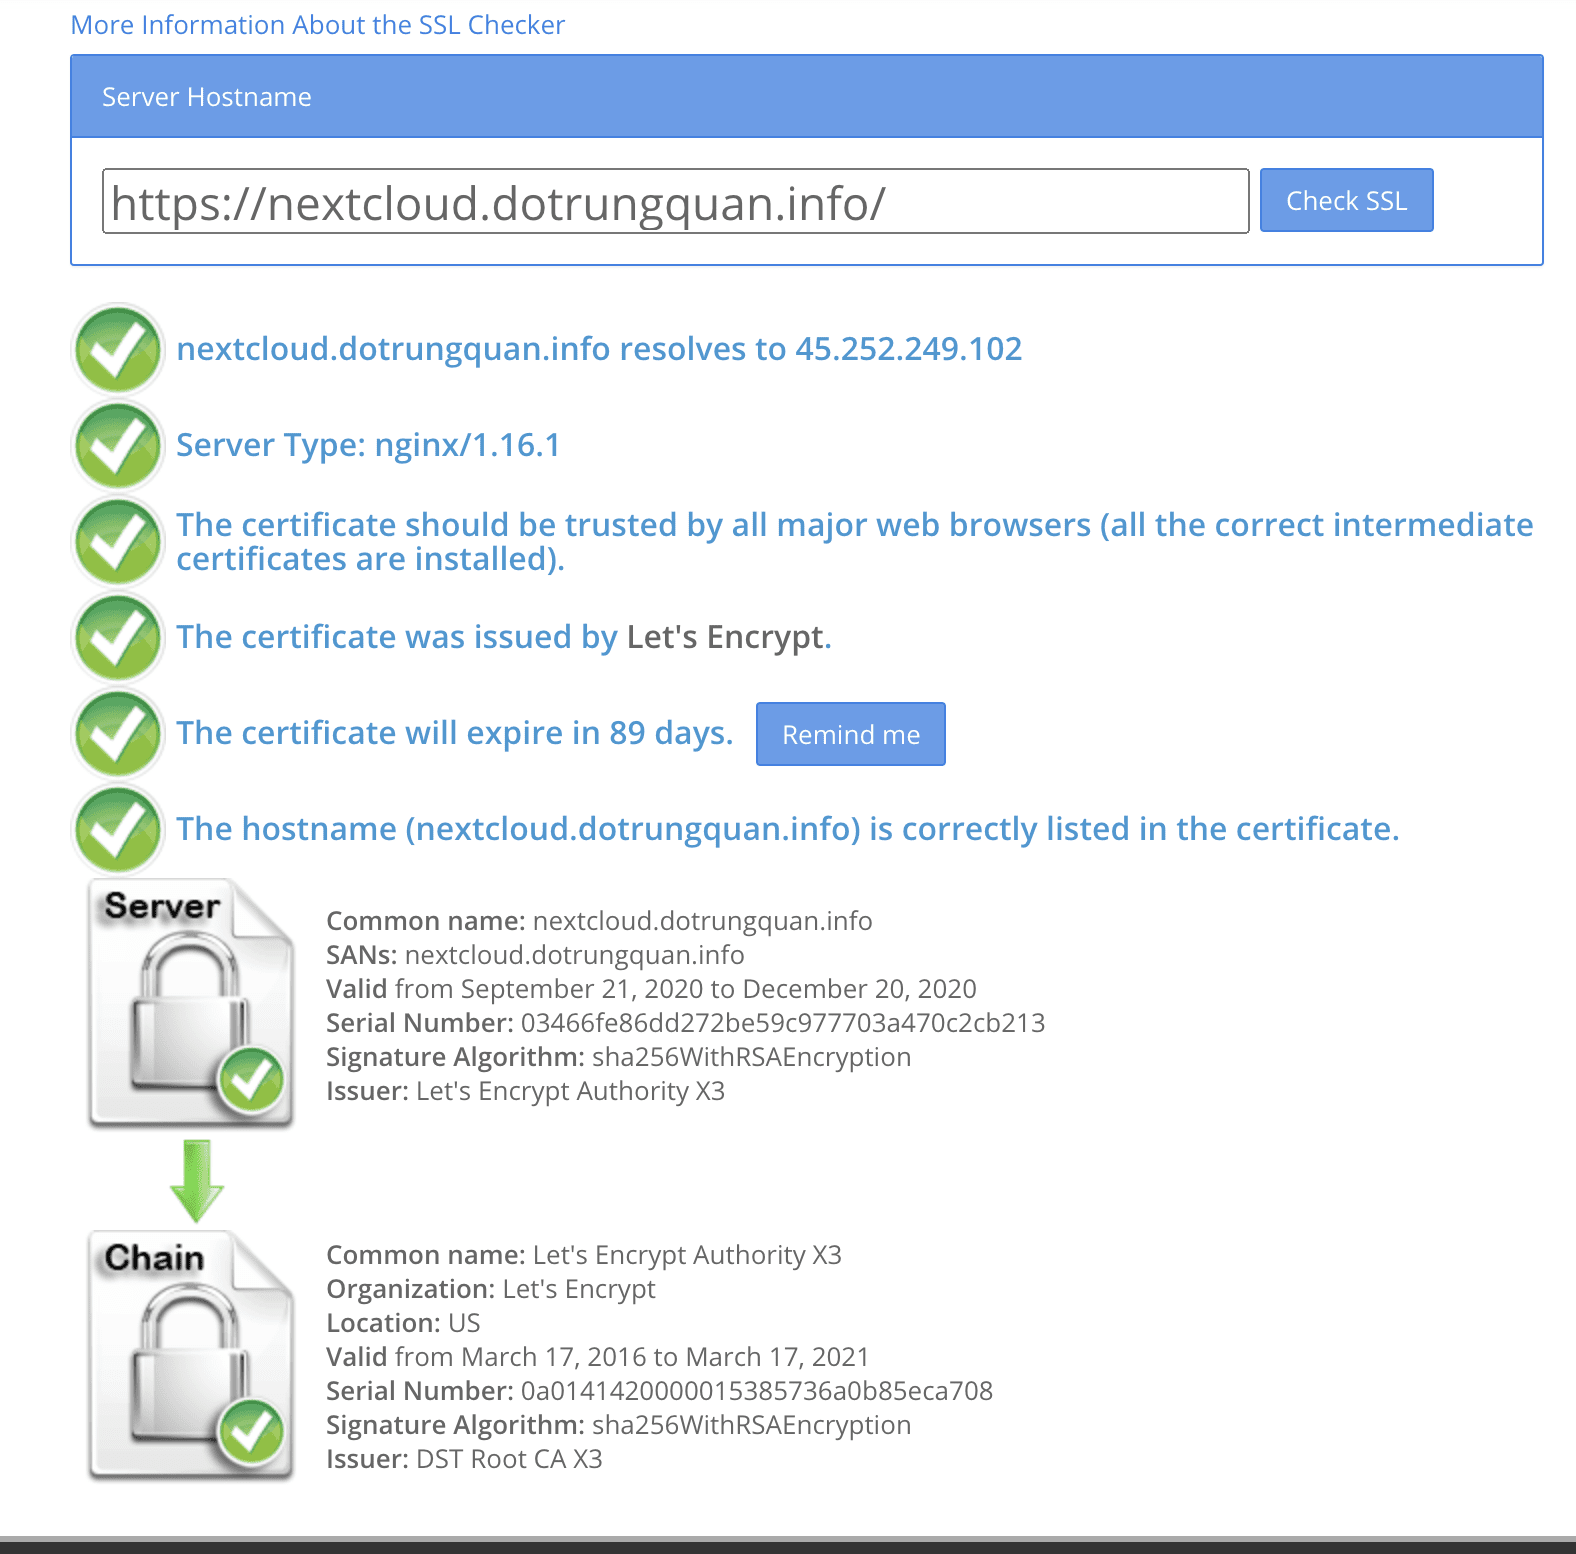
Như vậy mình vừa hoàn tất các bước cài NextCloud hoàn chỉnh. Hi vọng với bài viết này sẽ giúp bạn xây dựng một dropbox riêng cho doanh nghiệp của bạn. Nếu gặp trở ngại trong quá trình cài đặt hãy để lại ảnh, comment bên dưới nhé.

