Hướng dẫn cài đặt SSL Zimbra với Certbot trông 5 bước thực hiện
Như các bạn đã biết thì SSL là một chứng chỉ không thể thiếu khi website bạn hoạt động ở internet được. Với mỗi Control Panel, hay là các script và các máy chủ webserver đều có cách cài đặt riêng khác nhau. Nhưng chung quy thì cũng sẽ dùng chứng chỉ SSl Let’s Encypt cả.
Ở bài viết này mình sẽ hướng dẫn bạn thực hiện cài đặt chứng chỉ SSL lên Zimbra thông qua Certbot. Mời bạn theo dõi cùng mình nhé.
Cách 1
Bước 1: Stop jetty hoặc nginx service ở Zimbra level
Đầu tiên bạn vào user zimbra thông qua lệnh su và thực hiện stop các dịch vụ sau.
su zimbra
zmproxyctl stop
zmmailboxdctl stop
exit
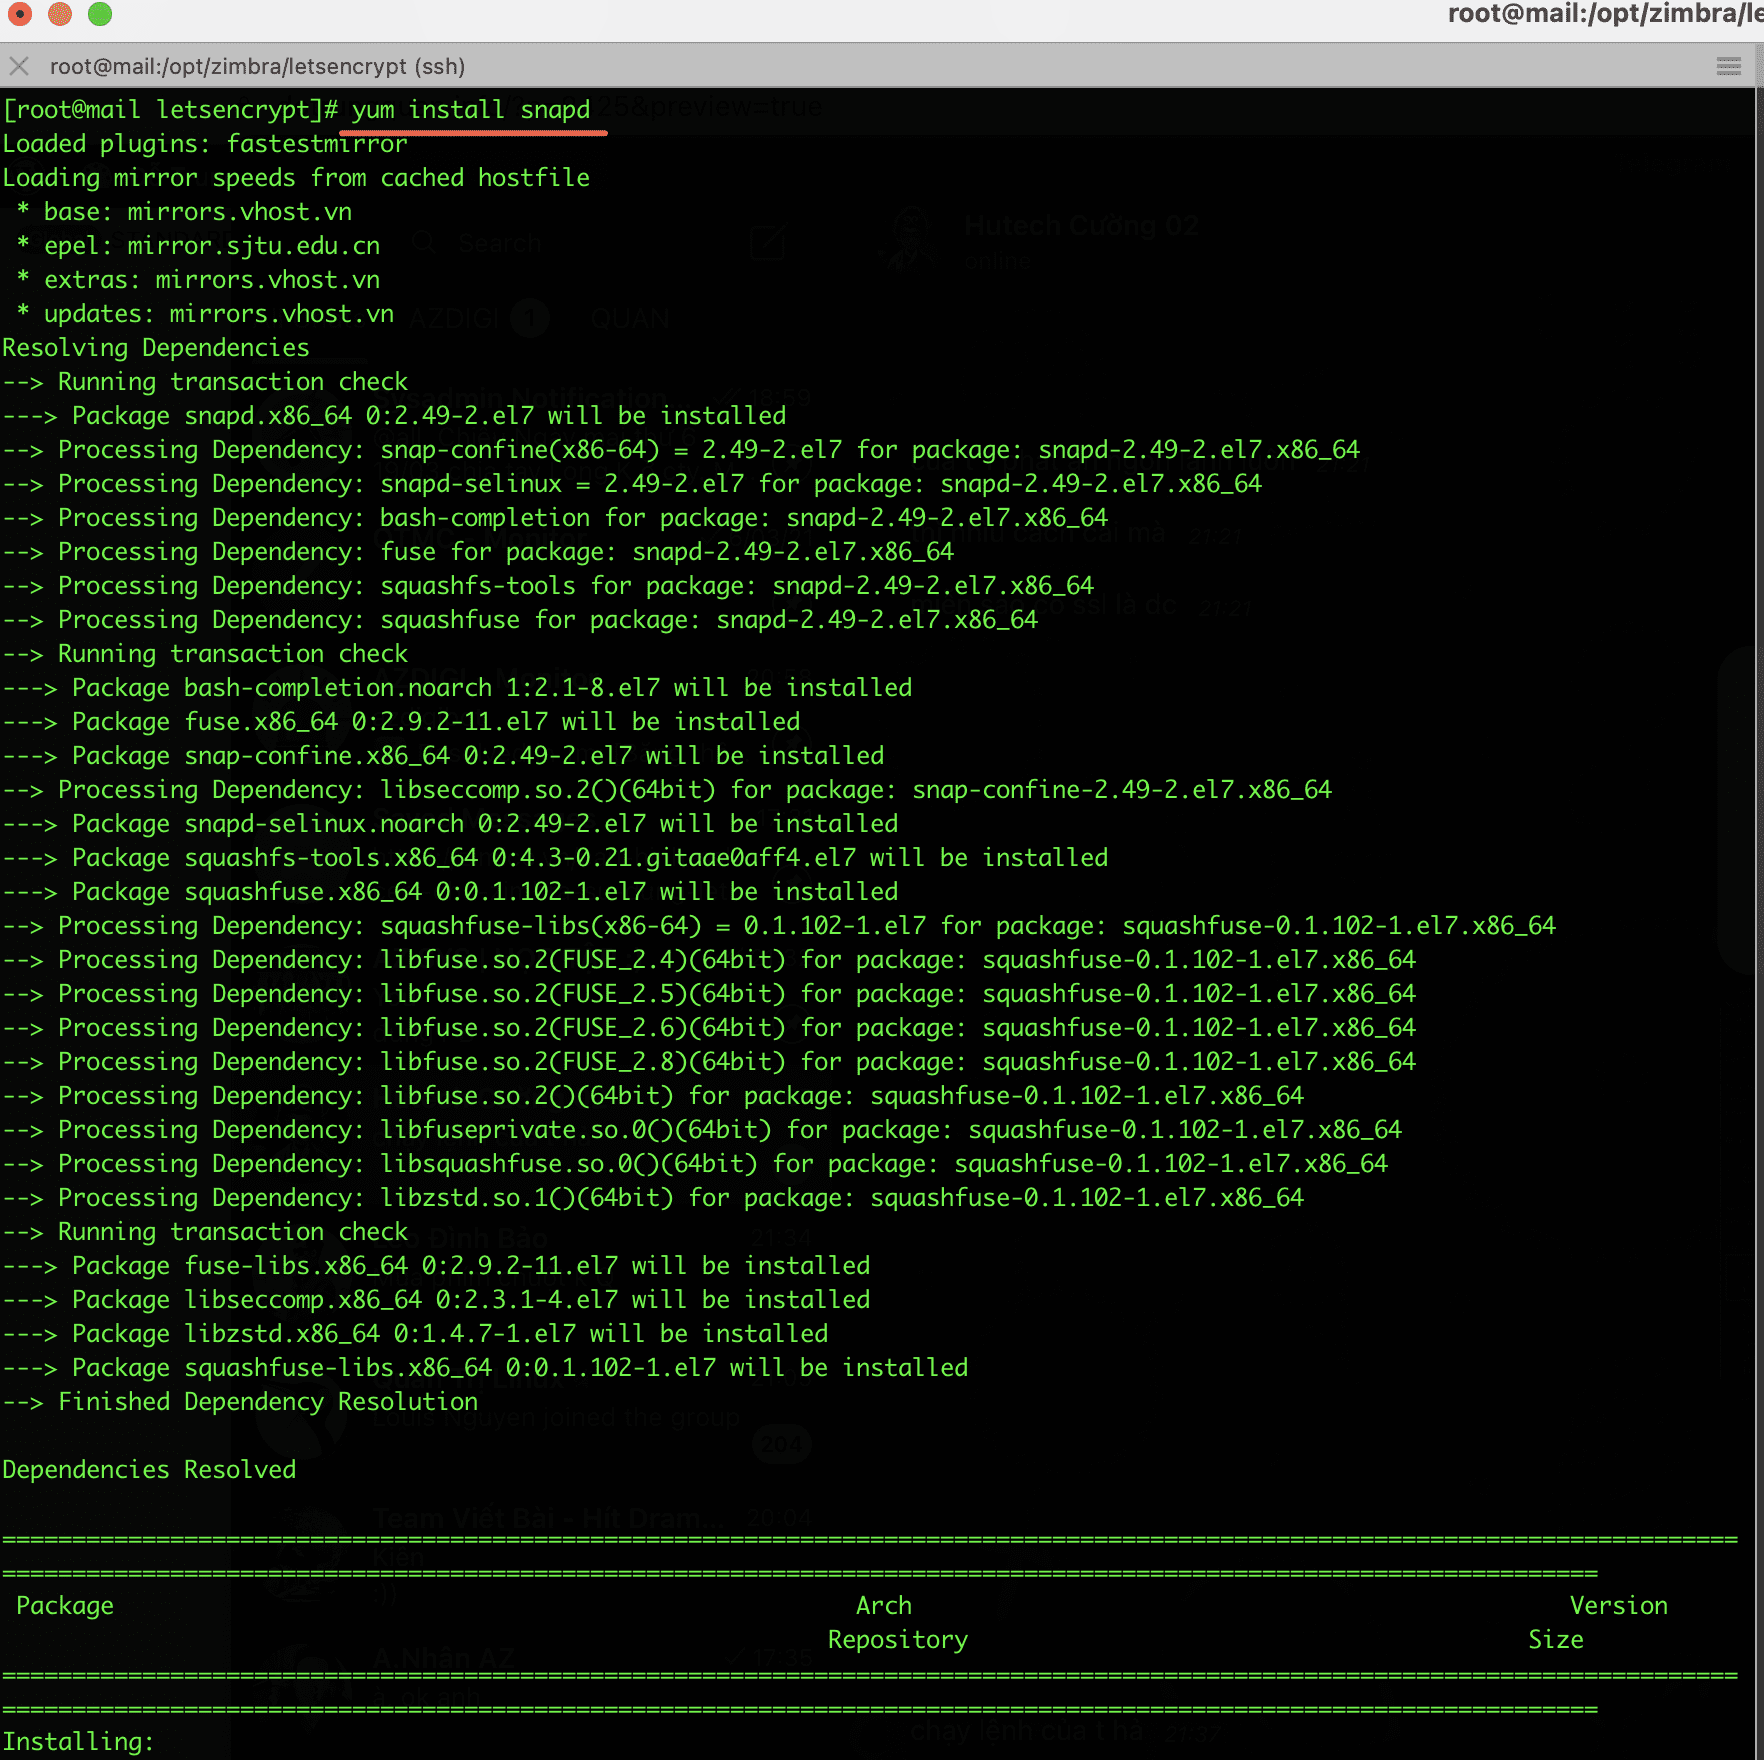
Bước 2: Cài đặt snapd
Tiếp đến bạn cần cài snapd vào với lệnh sau.
- Link trang chủ: https://snapcraft.io/docs/installing-snap-on-centos
yum clean all
yum install epel-release.noarch -y
yum install snapd -y
systemctl enable --now snapd.socket
ln -s /var/lib/snapd/snap /snap
Bước 3: Gở bỏ certbot-auto và bất kỳ certbot trên OS
Trước khi cài đặt bạn hãy gở bỏ các certbot hiện có để cài mới nhé.
sudo apt-get remove certbot #Ubuntu/Debian
sudo dnf remove certbot #CentOS8
sudo yum remove certbot #CentOS7
Bước 4: Cài đặt Certbot
Bây giờ bạn hãy cài đặt certbot với các lệnh như sau.
- Link trang chủ: https://certbot.eff.org/lets-encrypt/centosrhel7-other
snap install --classic certbot
ln -s /snap/bin/certbot /usr/bin/certbot

Bước 5: Chọn cách chạy Certbot
certbot certonly --standalone   #Yes, my web server is not currently running on this machine.

Or

certbot certonly --webroot     #No, I need to keep my web server running
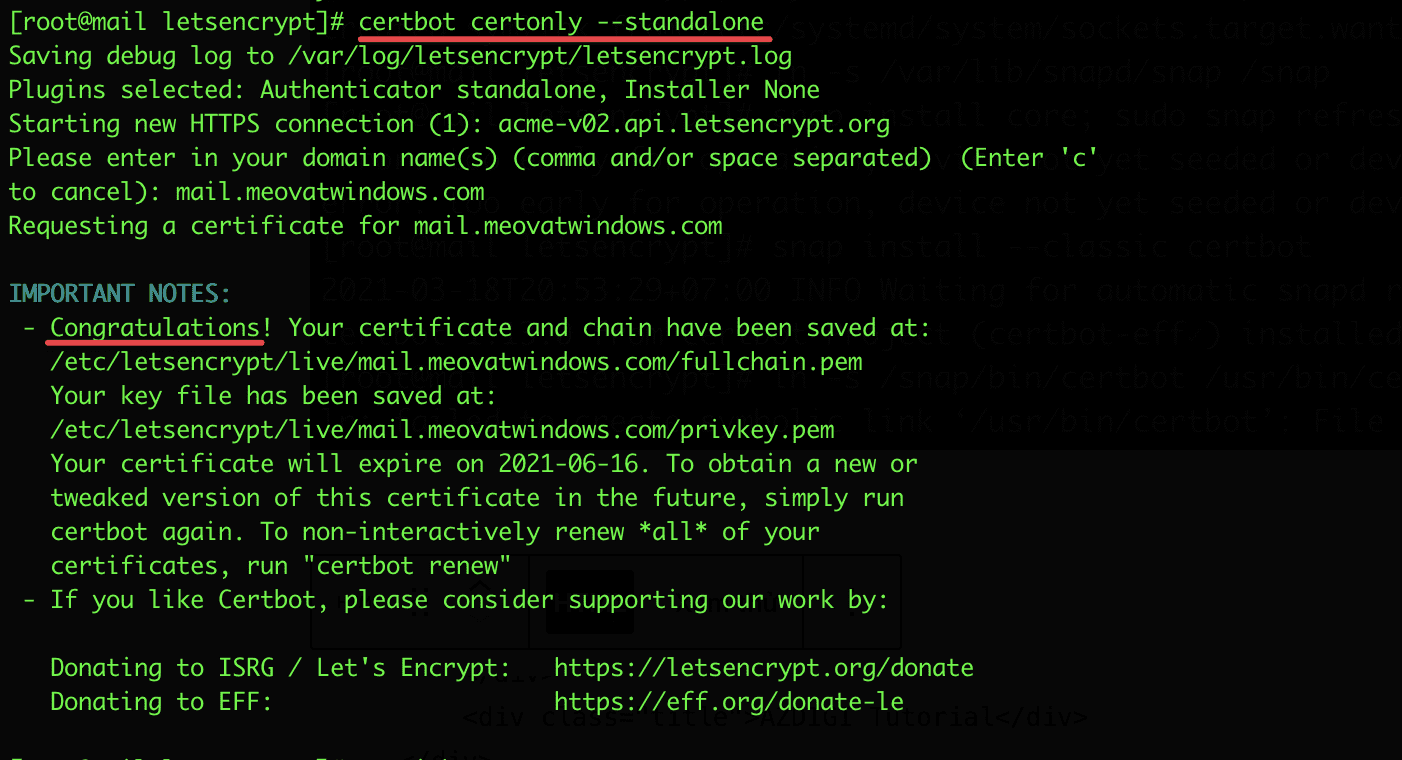
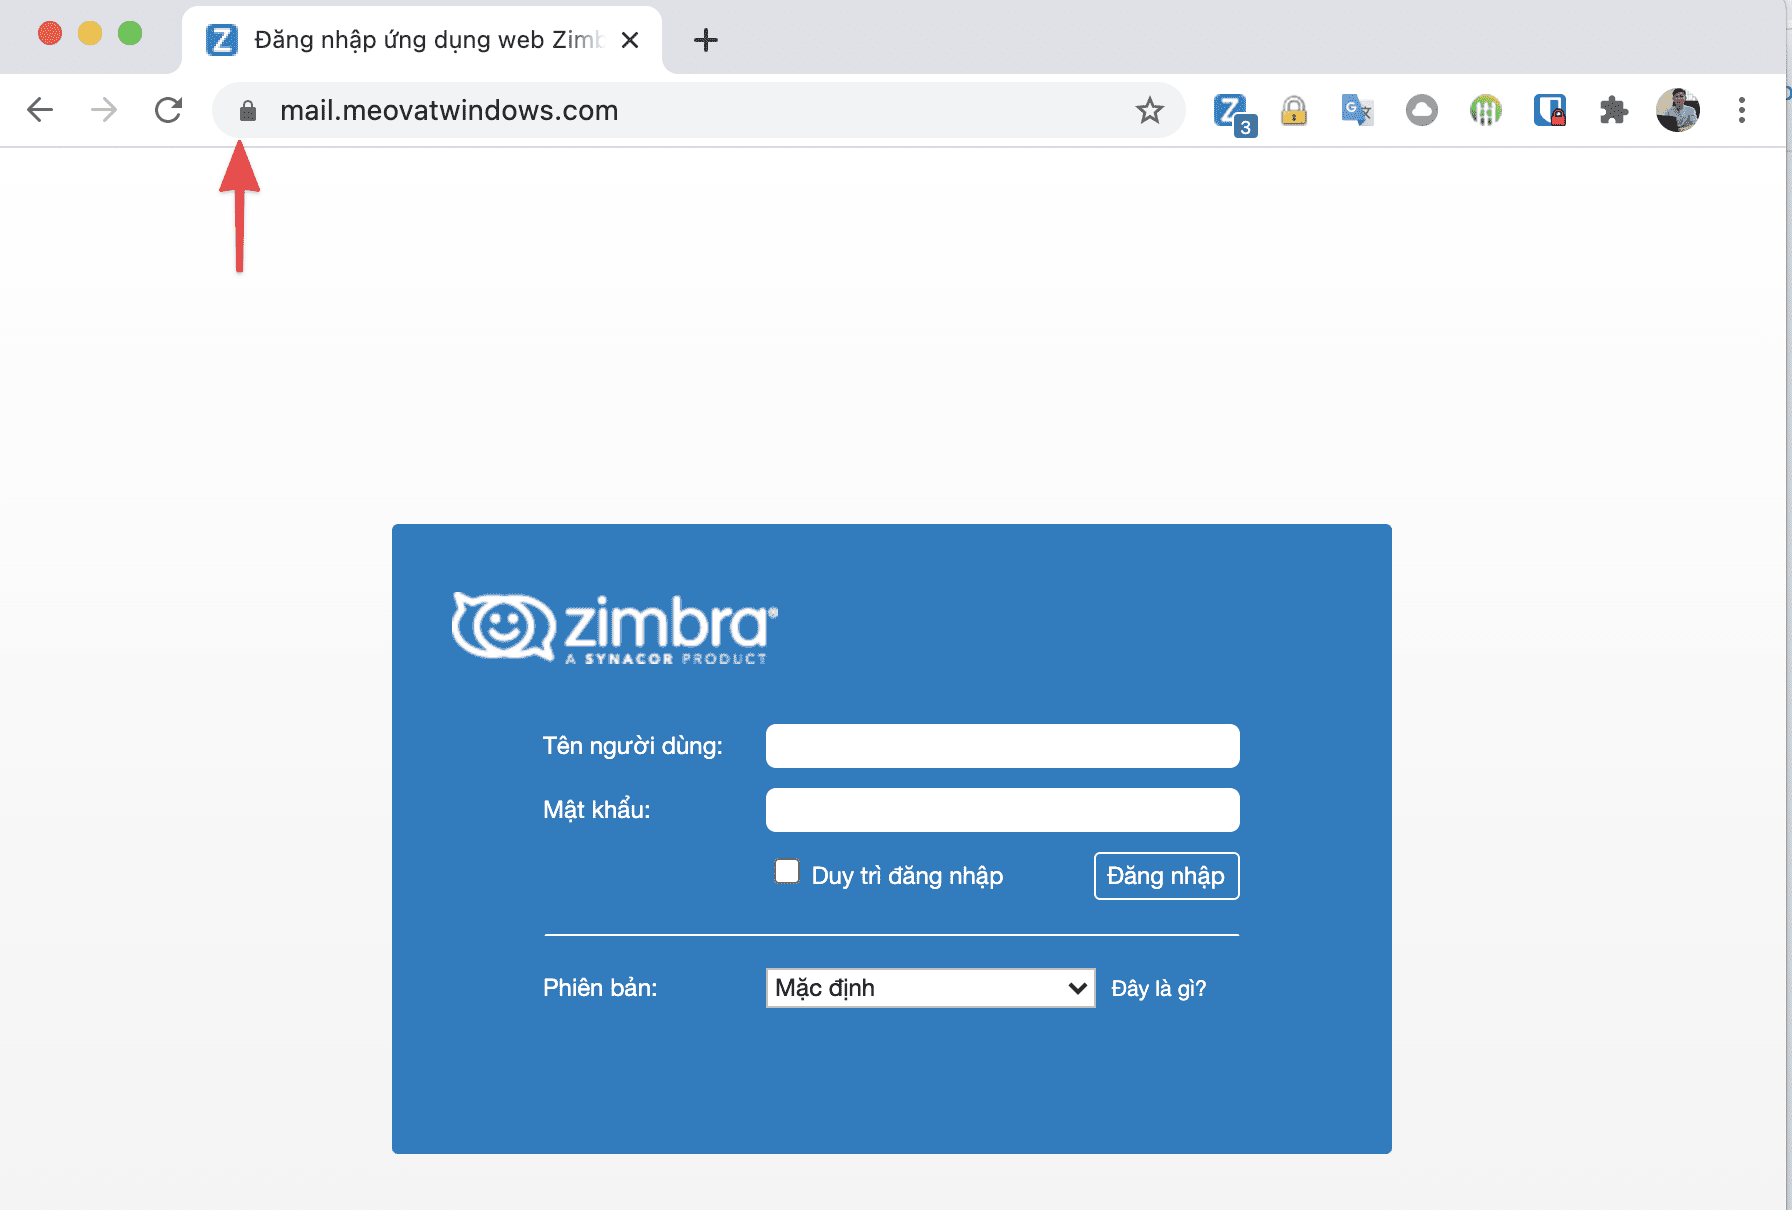
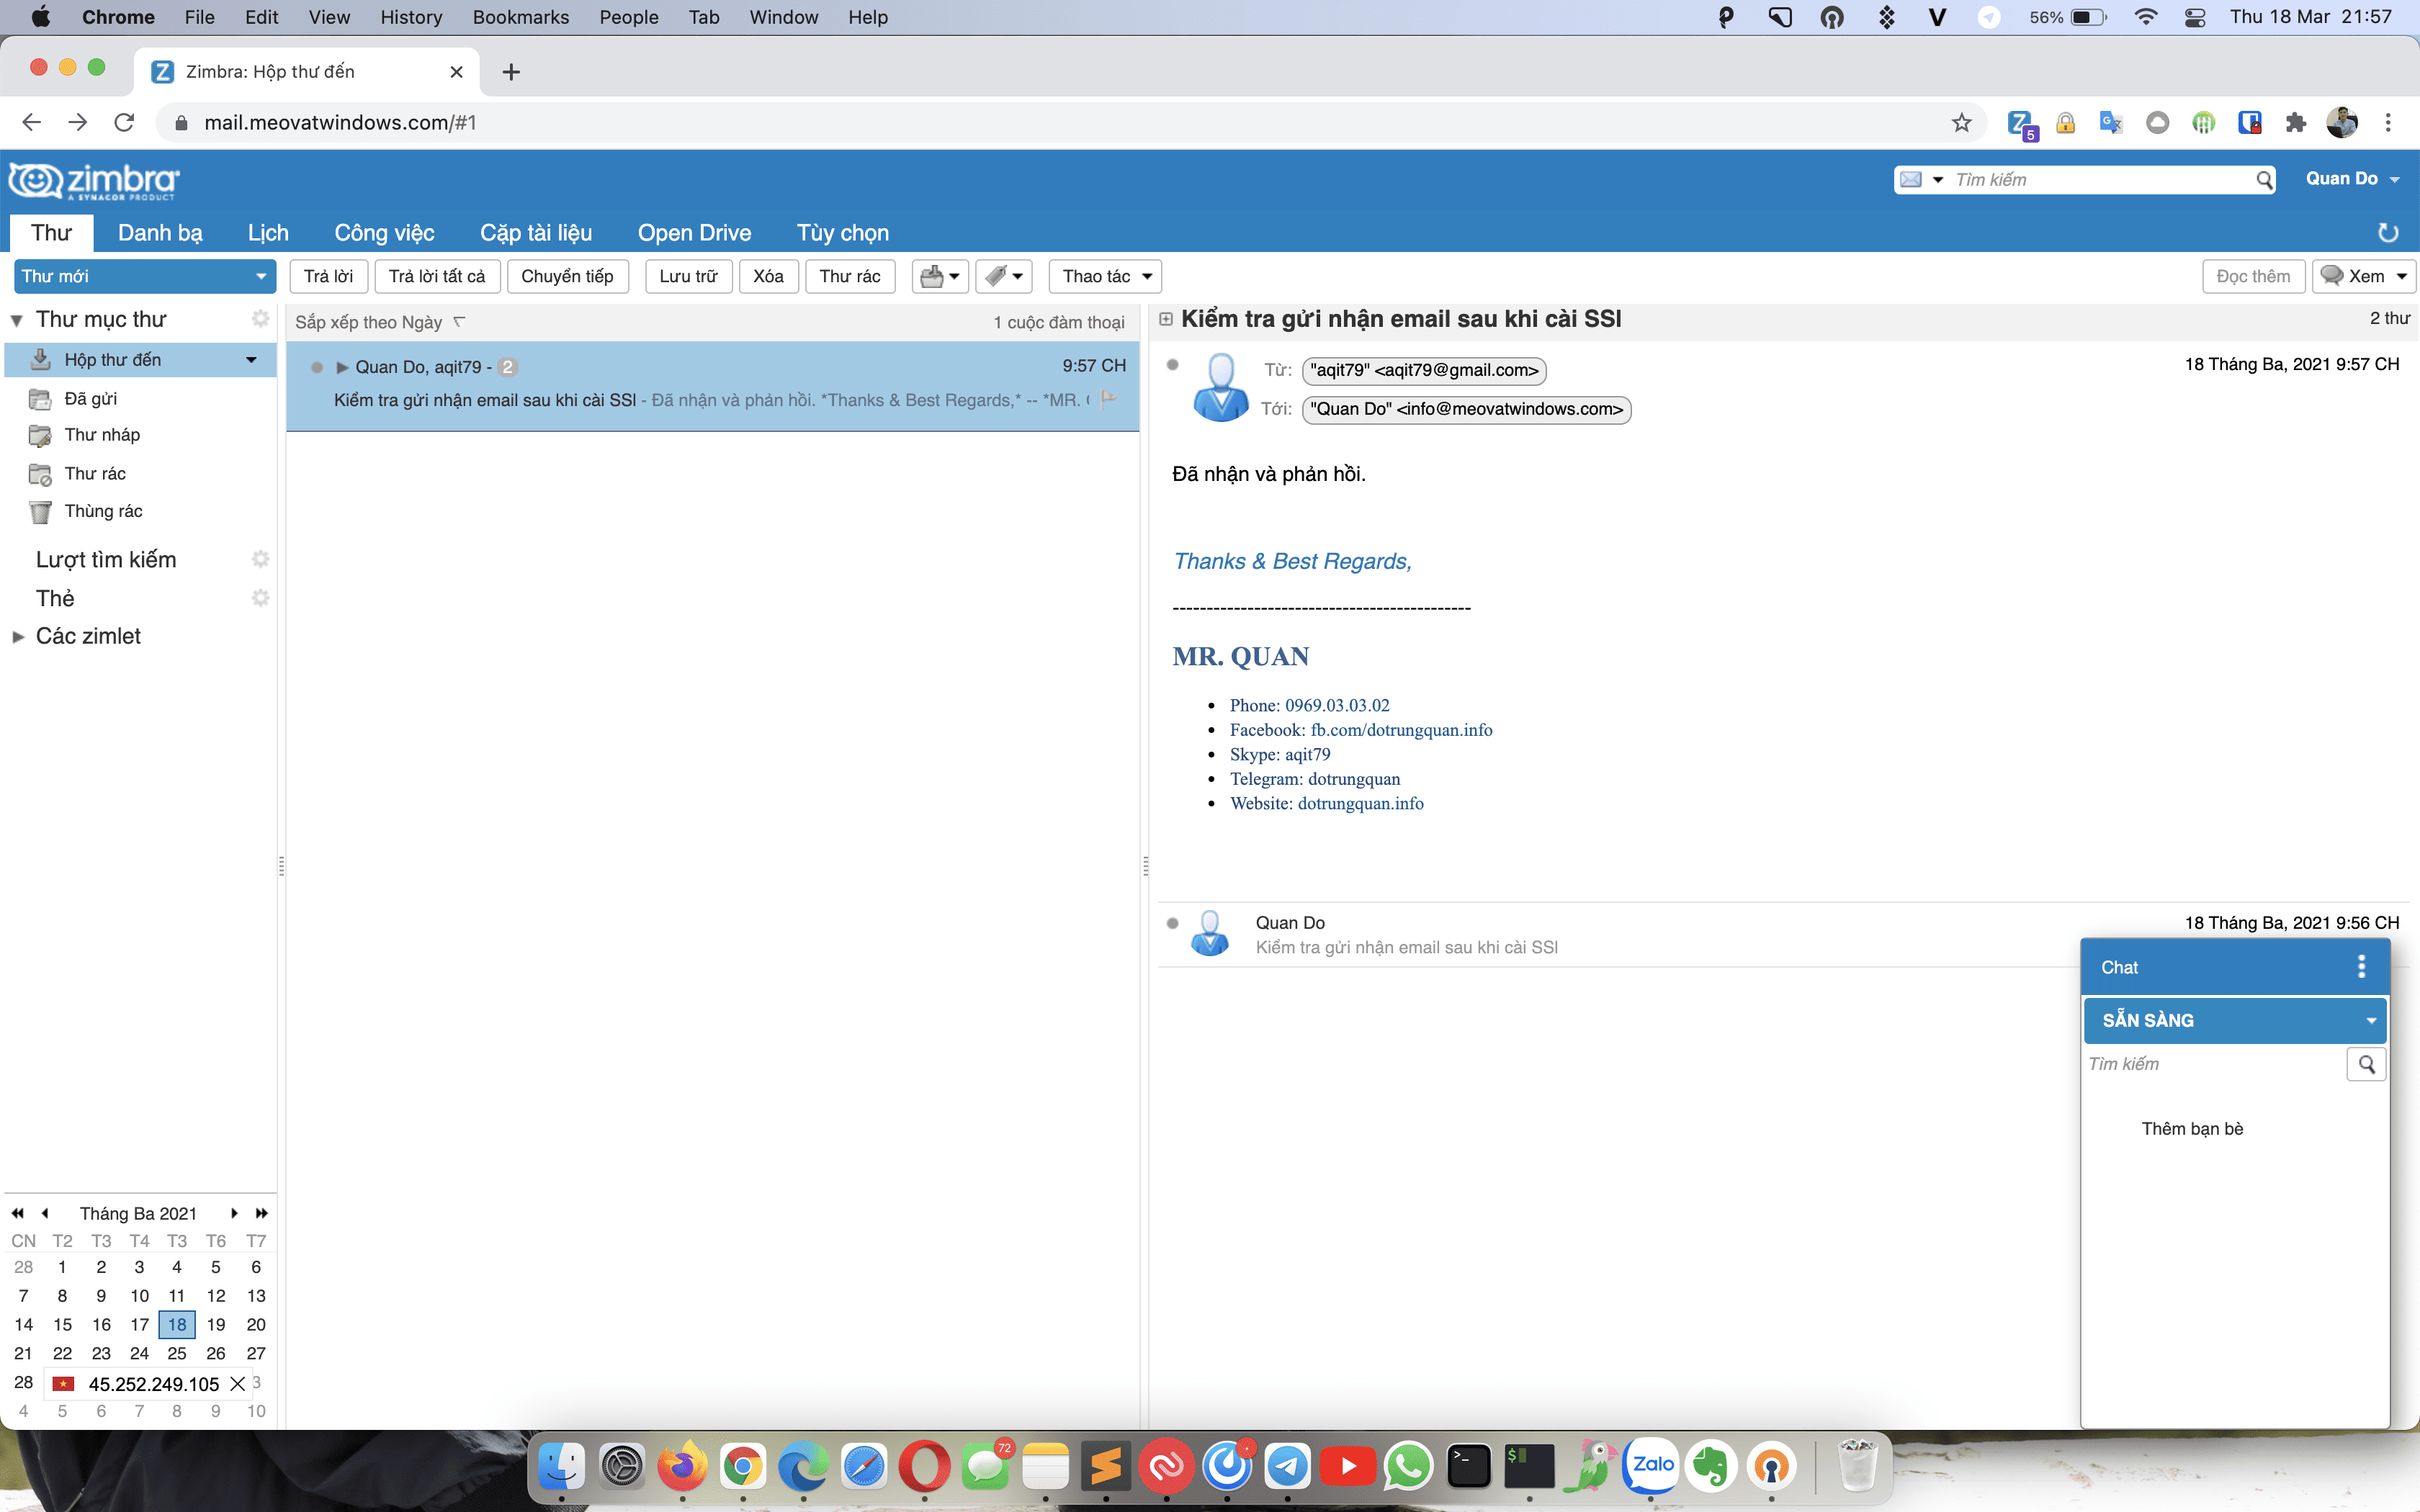
Và cuối cùng bạn hãy Khởi động lại dịch vụ đã stop ở bước 1 lênh nhé. Và bên dưới là kết quả thực hiện của mình.
su zimbra
zmcontrol start
zmcontrol restart
Cách 2
Ở cách 2 này mình sẽ hướng dẫn bạn từng bước thực hiện nếu ở Cách 1 chưa thể cài đặt được. Mời bạn tham khảo nhé.
Lưu ý: Ở cách 2 này bạn cần phải thực hiện đầy đủ Bước 1,2.3.4 ở Cách 1 trước nhé.
Bước 1: Thêm dòng include trước block Server
Thực hiện trên user root
Đầu tiên bạn mở file nginx.conf.web.https.default.template sau đó thêm dòng `
include ${core.includes}/${core.cprefix}.lets.conf;` vào file như ảnh đính kèm. Bạn hãy thêm trước block Server.
vi /opt/zimbra/conf/nginx/templates/nginx.conf.web.https.default.template
include ${core.includes}/${core.cprefix}.lets.conf;

Bước 2: Mở, tạo file cấu hình
Sau đó bạn mở file nginx.conf.lets.conf và thực hiện tiếp như sau và thao tác này đứng tại root
vi /opt/zimbra/conf/nginx/includes/nginx.conf.lets.conf
Sau khi mở file lên, bạn thêm vào cấu hình mẫu như sau.
Lưu ý: Phần server_name bạn thay đổi bằng server_name của bạn nhé. Ở đây mình sử dụng 3 tên miền trên máy chủ mail. Nên sẽ tạo 3 block với tên minh hoạ là domain-1.com domain-2.com domain-3.com
server {
        listen 80 default_server;
        server_name _;
        access_log off;

        location ^~ /.well-known/acme-challenge {
                root /opt/zimbra/data/nginx/html;
        }

        location / {

                rewrite ^/(.*) https://$host$request_uri     permanent;
        }
}

server {
        listen 80;
        server_name mail.domain-1.com;
        return 301 https://$host$request_uri;
        access_log off;
        root /opt/zimbra/data/nginx/html;
        index index.html index.htm;

        location ^~ /.well-known/acme-challenge {
                root /opt/zimbra/data/nginx/html;
        }

        location / {
              try_files $uri $uri/ =404;
        }


}
server {
        listen 80;
        server_name mail.domain-2.com;
        return 301 https://$host$request_uri;
        access_log off;
        root /opt/zimbra/data/nginx/html;
        index index.html index.htm;

        location ^~ /.well-known/acme-challenge {
                root /opt/zimbra/data/nginx/html;
        }

        location / {
              try_files $uri $uri/ =404;
        }
}

server {
        listen 80;
        server_name mail.domain-3.com;
        return 301 https://$host$request_uri;
        access_log off;
        root /opt/zimbra/data/nginx/html;
        index index.html index.htm;

        location ^~ /.well-known/acme-challenge {
                root /opt/zimbra/data/nginx/html;
        }

        location / {
              try_files $uri $uri/ =404;
        }
}
Bước 3: Khởi động lại dịch vụ mail
su zimbra
zmcontrol restart
Bước 4: Reissue SSL (Thực hiện ở root)
Ở bước này bạn sẽ thực hiện Reissue lại SSL để cấp phát chứng chỉ mới, sau đó mới tiếp hành deploy lên lại. Bạn sử dụng lệnh sau để thực hiện với certbot
Lưu ý: Thay mail.dotrungquan.info bằng tên domain của bạn.
certbot certonly --webroot -w /opt/zimbra/data/nginx/html -d mail.dotrungquan.info -d mail.meovatwindows.com --register-unsafely-without-email
[root@mail ~]# certbot certonly --webroot -w /opt/zimbra/data/nginx/html -d mail.dotrungquan.info
Saving debug log to /var/log/letsencrypt/letsencrypt.log
Certificate not yet due for renewal

You have an existing certificate that has exactly the same domains or certificate name you requested and isn't close to expiry.
(ref: /etc/letsencrypt/renewal/mail.dotrungquan.info.conf)

What would you like to do?
- - - - - - - - - - - - - - - - - - - - - - - - - - - - - - - - - - - - - - - -
1: Keep the existing certificate for now
2: Renew & replace the certificate (may be subject to CA rate limits)
- - - - - - - - - - - - - - - - - - - - - - - - - - - - - - - - - - - - - - - -
Select the appropriate number [1-2] then [enter] (press 'c' to cancel): 2
Renewing an existing certificate for mail.dotrungquan.info

Successfully received certificate.
Certificate is saved at: /etc/letsencrypt/live/mail.dotrungquan.info/fullchain.pem
Key is saved at:         /etc/letsencrypt/live/mail.dotrungquan.info/privkey.pem
This certificate expires on 2021-10-22.
These files will be updated when the certificate renews.
Certbot has set up a scheduled task to automatically renew this certificate in the background.

- - - - - - - - - - - - - - - - - - - - - - - - - - - - - - - - - - - - - - - -
If you like Certbot, please consider supporting our work by:
 * Donating to ISRG / Let's Encrypt:   https://letsencrypt.org/donate
 * Donating to EFF:                    https://eff.org/donate-le
- - - - - - - - - - - - - - - - - - - - - - - - - - - - - - - - - - - - - - - -
Bước 5: Deploy SSL lên Zimbra
Khi Reissue SSL hoàn tất, bước tiếp theo bạn hãy deploy chứng này này nên để hoạt động. Bạn sử dụng lệnh sau và lưu ý hãy thay mail.dotrungquan.info bằng tên website của bạn nhé.
mkdir /opt/zimbra/ssl/letsencrypt
cp /etc/letsencrypt/live/mail.dotrungquan.info/* /opt/zimbra/ssl/letsencrypt/
chown -R zimbra:zimbra /opt/zimbra/ssl/letsencrypt/
ls -la /opt/zimbra/ssl/letsencrypt/
echo > /opt/zimbra/ssl/letsencrypt/fullchain.pem
vi /opt/zimbra/ssl/letsencrypt/fullchain.pem
Sau đó bạn thêm vào bên dưới CAcrt sau của letsencrypt vào file fullchain.pem
su zimbra
cd /opt/zimbra/ssl/letsencrypt/
/opt/zimbra/bin/zmcertmgr verifycrt comm privkey.pem cert.pem fullchain.pem

Output:
** Verifying 'cert.pem' against 'privkey.pem'
        Certificate 'cert.pem' and private key 'privkey.pem' match.
        ** Verifying 'cert.pem' against 'fullchain.pem'
        Valid certificate chain: cert.pem: OK
Khi thực hiện hoàn tất, bạn hãy restart lại dịch vụ với lệnh zmcontrol restart để áp dụng thay đổi nhé.
cp /opt/zimbra/ssl/letsencrypt/privkey.pem /opt/zimbra/ssl/zimbra/commercial/commercial.key
cp: overwrite ‘/opt/zimbra/ssl/zimbra/commercial/commercial.key’? y

/opt/zimbra/bin/zmcertmgr deploycrt comm cert.pem fullchain.pem
zmcontrol restart
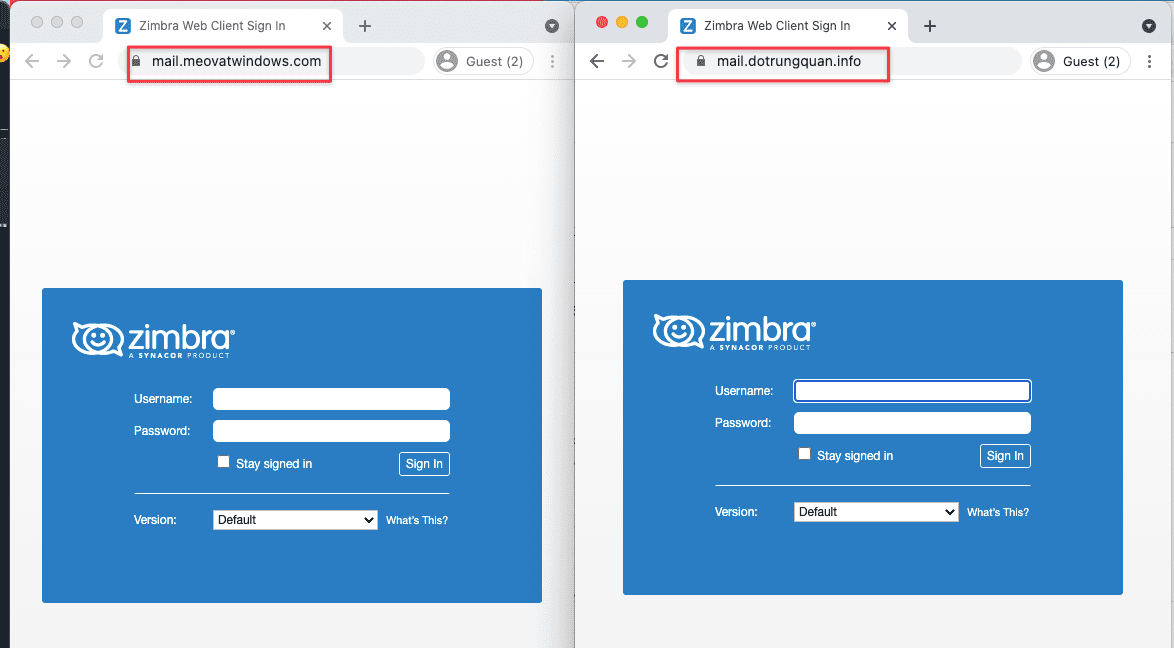
Như vậy mình đã hoàn tất bài Hướng dẫn cài đặt SSL Zimbra với Certbot. Hy vọng bài viết này có thể giúp bạn thực hiện cài đặt SSL nhanh chóng và thành công.
- Tài liệu tham khảo: https://wiki.zimbra.com/wiki/Installing_a_LetsEncrypt_SSL_Certificate

